
Sandblast etching is one of the most elegant processes that you can use and my favorite processes. This tutorial shows the basic steps.
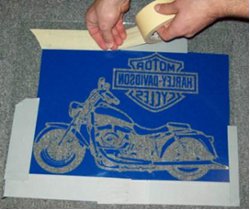
 Follow the first 3 steps just like the cream etching method by creating a stencil resist which was discussed before. In the example shown, I chose to etch from the backside of the glass. To do this, I had to reverse the image in the software by using a “mirror tool”. Overall, the other steps are relative, but the only difference is that you may want to use a thicker resist material if you are engraving deep into the glass. Also, I masked all areas outside the glass to prevent over blast.
 Second, you need to take a sandblaster and blast the exposed areas of the stencil resist by abrading with a constant back and forth motion.
You can see, I use to used a deadman sandblaster valve which I don’t recommend. I now use some cool stuff that is both inexpensive and works great in the members area.
Each stroke should be overlapped about 50% to evenly etch into the glass. Once the glass is etched to your desired depth, you can peel the resist stencil off and clean up. You can use your Xacto knife or tweezers to pull the pieces off.
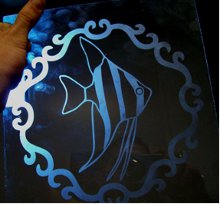
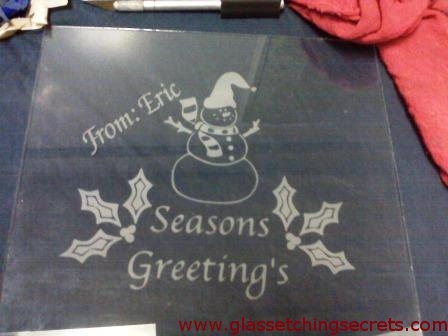
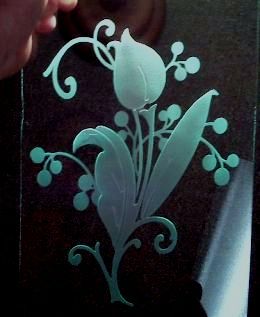
I found that rinsing warm warm over the stencil for a majority of materials helps make this step very easy to do. You can either rinse the water over the stencil or dip it in a tub while removing it. I turned the finished piece around so it’s looked at from the other side. You can choose either side to etch, but just make sure that you “mirror” the design first in your software. If you’re sandcarving, you will want to etch it the same way I did here.
 Follow the first 3 steps just like the
 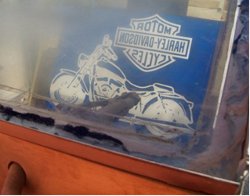 Second, you need to take a sandblaster and blast the exposed areas of the stencil resist by abrading with a constant back and forth motion.
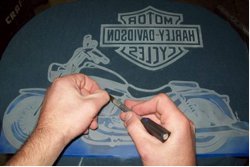 Once the glass is etched to your desired depth, you can peel the resist stencil off and clean up. You can use your Xacto knife or tweezers to pull the pieces off.
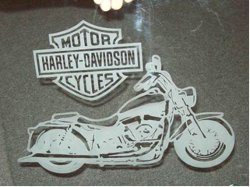 I turned the finished piece around so it’s looked at from the other side. You can choose either side to etch, but just make sure that you “mirror” the design first in your software. If you’re sandcarving, you will want to etch it the same way I did here.
Check out my better mapped out and pictured tutorial information.
Share this on social media or email by clicking below!

this is my first sandblast how do i cut the design out? what should i cut out?i wonder….
Hi Char, there are quite a few ways to cut it but the simplest is to use a exacto knife. Just pick out a black & white pattern and trace it onto the stencil- then pull the cut part out that you want to etch.
I am looking for a stencil like your Harley Davidson one to etch sa mirror for a friends birthday where can I get one? Thank you for any help you can give me.
One of the things I show people in my membership area is to search for black and white images. So you would search for something like “Harley Davidson logo” and the next search for “motorcycle graphic”.
I actually combined 2 designs this way, except my motorcycle graphic was purchased in a CD vector designs package.