Member's Login
Glass Etching Secrets: Learn to Create Etched Art Glass with Stencils & Unique Techniques
  • Home
  • About
  • Etching Processes
    • Sandblasting
      • Sandcarving
    • Cream
      • Free etching cream!
      • Armour Etch Glass Etching Cream
    • Hydrofluoric Acid
    • Engraving
    • Basic Supplies
  • Blog
  • Shop
    • Armour Etch Glass Etching Cream
    • Pressure Pot Sandblaster Plans
    • Make a Mini Sandblaster Plans
    • Vari-Blast Sandblaster Footswitch Plans
    • How to Make an On-Site Sandblaster Plans
    • Sandblaster Tee for Pressure Pot with Conversion Kit
    • On Site Glass Sandblasting Kit- “Vacu Blast”
    • Stencils Shop
    • Glass Paint
    • Sandblasting Rock eBook & Guide
    • Sandblaster Nozzles & Hoses
    • Bottle Cutter
    • Glass Candle Making Supplies
    • Glass Etching Kits
  • Glass Etching Secrets eBook
  • Contact

What Technique was Used for this Etching?

Posted on February 5, 2010 by Eric Robert Posted in Blog Content

Here’s some more answers to questions I got in my email from Dianne.  These are all great questions, and I appreciate them because it provides great discussions.

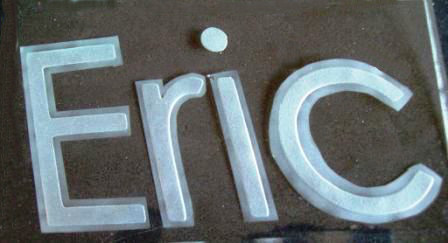
She showed me an image of a etching that was being sold through ebay.  Although, I wish I could post the image so everyone can post their views and understand what I am talking about, it’s a copyright protected image, so I’ll explain from a different pattern example.

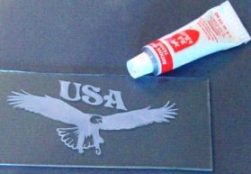
As she suggested, the glass that she showed me might be etched using an acid.  The mug looked nice, but it’s was hard to determine from the small image.  It had an interesting look, and it appeared as if the majority of the design was sandcarved into the glass.  From what it seems, the internal areas seem to be frosted lightly.  There are many different techniques that could be used, and here are just some ideas of what they could have done by referring to the example pattern below:

Explanation of etching.

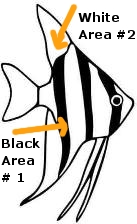
Usually, you will have a black area and a white area of a pattern.  By using a two stage technique, the whole graphic is etched including the black and white areas.  This is a very simple pattern found on here for free.  It depends on the processes used and the etching technique is probably one of the following variations:

  1. Using Acid Etching Processes– The glass can be carved deeply into the # 1 black areas with a strong acid.  Then the # 2 white areas of the pattern could be lightly frosted with a less potent cream.  This can also be done in a vice versa fashion.
  2. Using Sandblasting Processes– The other process could be done by sandcarving the glass pattern’s # 1 black area.  Then the #2 white areas can be sandblasted lighter with a reduced air pressure.

I hope that helps and I talk about it more in the information manual.  Feel free to leave me a response below or any other questions anyone has.  Take care.


Share this on social media or email by clicking below!
Facebooktwitterredditpinterestmail

Related posts:

sandcarved and shaded glass example.2 Layer Technique On Letters with Tip Positive etching on a beer mug.Positive and Negative Etching Whitening technique for etched glass with rub n buff.How to get a whiter etching? Default ThumbnailEtching/Engraving Types
« Review of the Information Manual
Solutions for PhotoResist Blow Outs »

Leave a comment

Your email address will not be published. Required fields are marked *

Sign up

Categories

  • Blog Content
  • Glass Art Spotlight
  • Glass Etching Stencils Shop
  • Other Glass Supplies
  • Other Pages
  • Questions About Products, Etching, & Sandcarving
  • Sandcarving Examples
  • Tutorials

Access Training Material

Order the training materials here.

Search

Copy Code & Add to Your Website
Contact Us | Privacy Policy and Terms of Service | Informational News Blog | Members Login Secure payment by paypal and these credit cards.
Grab a Button
I'm a fan
© Glass Etching Secrets