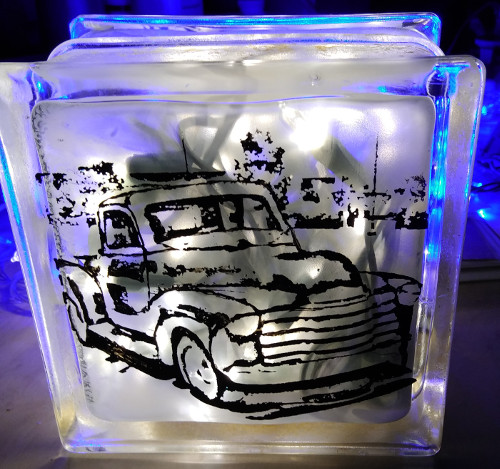
 I recently got the question about cutting a slot into a glass brick. He mentioned most of the information online was about drilling a large hole in them so lights can be placed inside. Drilling a hole in the hollow glass block has become a popular craft but I wasn’t aware that they sold solid bricks which is an interesting idea itself for even sandcarving very deep into. The below are some links to examples:
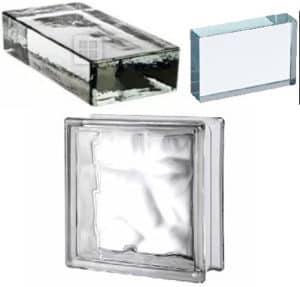
- Solid Glass Brick: this is a decent size one and they there is a tiny one here.
- Hollow Glass Blocks: https://amzn.to/2IK6jou
He wants to cut a slot in the glass brick so he could insert a photo inside. Since he couldn’t find information on this, I wanted to provide some of the below ideas. I have never cut a slot into a glass brick or a block but the below suggestions is what I think would work. If anyone else has done this, please leave a comment below.
Side Note: I didn’t think about the fact that cutting into the cross section of a solid glass brick would etch (cloud) the inside until after writing these ideas. So it probably isn’t even possible to clearly see a photograph placed inside it unless maybe the photo is sandwiched in between a coating of clear epoxy. It might be possible that the clear epoxy will fill in the inside etched glass to make it clear again but maybe not- it would have to be tested. The clear epoxy idea is discussed at the bottom of this post.
Oscillating Power Tool with Diamond Grit Blade
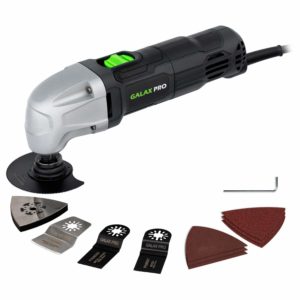 My first thought was to use an oscillating power tool with a diamond grit blade. I have only recently used one of these tools for general use (not glass working) and they work really well. It basically moves back and forth maybe an eighth or quarter inch at high speeds. The tool doesn’t hammer from side to side as much as I thought it would.
However, the only issue with this is that I haven’t found one long enough to cut deeper than maybe a couple inches. For a glass block, it should work fine since the glass is less than an inch until it hits the hollow part.
For a solid glass brick, you would either need to find a oscillating diamond blade long enough for your photo or modify a shorter blade. It might be possible to cut the the blade in half and elongate it with a piece of sheet metal in between. You would probably have to lightly tack weld the sheet metal with the previous blade sides.

Example of the flush cut blade with diamond grit.
There are at least 3 different blade shapes that I think would work for cutting into a glass brick:
- Flush Cut Blade
- Swing Blade
- Semi-Cirle cut Blade
The straight flush cut blade might work just fine. It would be easier to make the cut inside straight all the way down through the brick. If it seems like there are issues cutting, you may want to start with the swing or semi-circle blade shape, followed up with the flush cut to make the bottom corners square.
- Diamond Oscillating Blades on Amazon: https://amzn.to/2Mx2SCP
- Oscillating Power Tools on Amazon: https://amzn.to/2M5WOlC
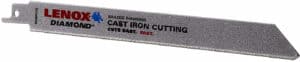
Reciprocating Saw with Diamond Grit Blade
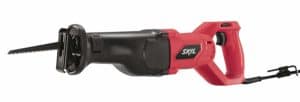 For hollow glass blocks, this is an easy one. All you would need to do is drill a large enough hole in the top for a reciprocating blade to fit in, then cut slots on both sides of the hole.
Alternatively, you could just use a hole saw to cut out a hole, roll up the photo to insert it inside and use a pen to open it up. Clear glue could be used to make the corners stick. You might be able to use this other member’s idea he shared on using a balloon to press the photo up against the inside. You would just need to be cautious about glue adhering to the balloon inside.
 When cutting solid glass bricks with a reciprocating saw, you would need obviously need to cut through it edge to edge. This may be unpleasant looking and the picture could slide out on the sides but I have another idea for this at the end of the post.
Reciprocating Saw on Amazon: https://amzn.to/2Vz1mnF
Diamond Reciprocating Saw Blades on Amazon: https://amzn.to/2VF08HF
Hand Bow, Coping or Hacksaw with Diamond Grit Blade
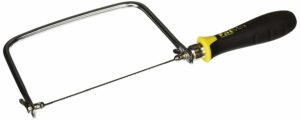 If you don’t mind hand sawing through the glass, you can try using a bow saw, coping saw or hacksaw that is wide and tall enough for your glass brick. Then you would need to find a diamond grit blade to fit it.
You should try searching with one of those terms to find something that will work. You can see some examples here: https://amzn.to/2OF6dT9
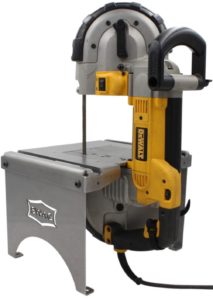
Bandsaw with Diamond Grit Blade or Large Ring Glass Saw
 There are ring saws specially made for cutting glass but I haven’t seen one wide enough to cut large slots in the cross section of a piece of glass.
Another idea is to use a wide bandsaw with a diamond grit blade. You would just need to make sure it is wide enough for the glass you need to cut. More research of the different brands would need to be done here to see if any are wide enough for your picture.
- Bandsaws on Amazon: https://amzn.to/2OE4LjK
- Diamond Grit Bandsaw Blades on Amazon: https://amzn.to/2oCH6Wn
How to Fill in the Slot Edges After Picture is Inside
 Since it seems like the easiest way to cut a slot in a glass brick is to do a cross section saw cut from edge to edge. My thought is after the picture is inserted in the cut slot, you could just reseal the glass block up with a clear epoxy resin.
You can find all types of epoxy brands and quantities on Amazon here: https://amzn.to/2B1Fx6U
Epoxy resin can get a little bit expensive but it should go a long way since filling a thinly cut slot won’t take a lot to fill it.
You could need to clamp a board on each side of the glass slot to hold in the liquid epoxy until it dries. You would just pour in the mixed epoxy through the top. Once dry, remove the wood sides and sand it smooth.
Please let me know your thoughts or questions
So overall, these are my ideas that may help. If you have tried one of these, let me know what works best for you in the below comment section.
Share this on social media or email by clicking below!