
This is just another step by step tutorial on how to sandblast glass that I took awhile ago. The images were on my camera doing nothing, so I thought I would post them on here and maybe it will help someone. So here it goes:
- In the first step, I found a pattern to use. It doesn’t have to be a design specific to this hobby as some people think. It only needs to be black and white. I used my computer and cutter like I explained to you in the etching manual: glassetchingsecrets.com/info.html.

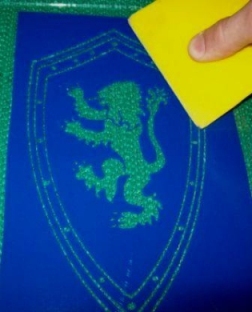
- Second, I removed the backing paper from the stencil and aligned it on the flat piece of glass. Use a squeegee to place the vinyl stencil smoothly on the glass without any air pockets. Make sure its masked off around the edges to prevent over blast.
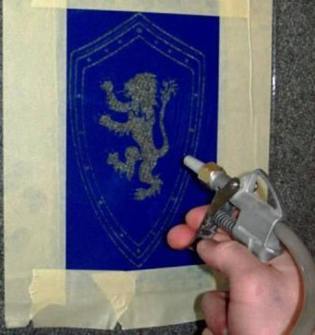
- Third, sandblast the over the cut out areas of the stencil. I think I used about 30 pounds per square inch for the air pressure.
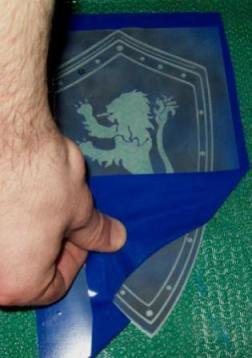
- After its etched evenly, peel off the stencil and masking tape.
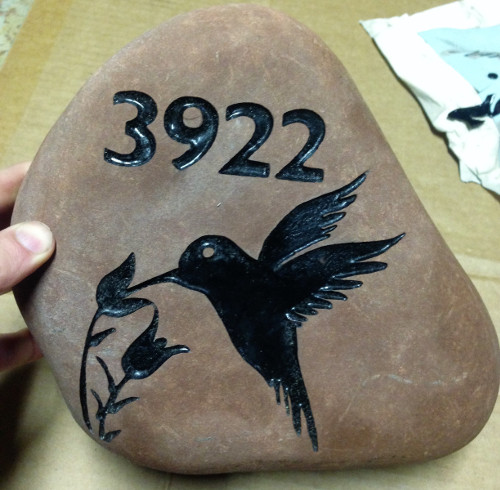
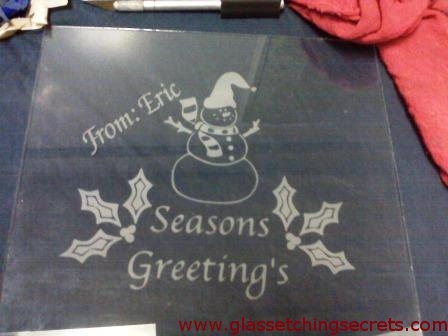
- And here is the finished product. I know the project is simple, but please hit the Like button below or share it with someone.


If I see that people like this tutorial, I will be posting more ones with better content this spring. Lately, it has been too cold for me to sandblast outside. Also, if your new to this type of etching, you can read more about abrasive blasting glass or sand carving processes. OH, yeah- don’t forget to leave a comment!
Share this on social media or email by clicking below!

Very simple editorial but great as a starter for beginners. It should be followed up with more complex editorials. But a good start if you don’t have the manual.
i would like to know more about this –thank you
Great tutorial! That was a big help for me as a raw beginner! THANKS!
Very nice
Justgetting started in etching…..excited to see the tutorials on sandblast as well as glass etching. Thanks for the info I have already devoured!
Interesting, Eric… Keep up the good work and expand!:-)
Eric,
Another fine piece of instructional material. Keep ’em coming!
Much Appreciated!
Rick
Hello, very interesting this tutorial … will certainly help many of us to develop a work that encourages us to seek new techniques, new compositions, new horizons. Thank you. Hugs
Renata
Great tutorial, Question I see you are not using a sandblast box, Are they necessary? I am a soon to be beginner. If I have equipment needed.
Barbara
Hi Barbara,
The sandblast cabinets aren’t required unless laws in your area prohibit outside sandblasting. Either way, they are helpful at protecting you from sandblast abrasive and it keeps all of the abrasive together for reuse.
Just make sure you wear protective clothing & gear if you don’t use a cabinet. I like to lay out a tarp to collect it all if I’m not using my cabinet.
Thanks for all the comments!
Your tutorials are very helpful. Keep them coming. Thanks.
Dear Eric,
thank you very much for your kind email, will be waiting for your next tutorials.
warm regards
Slaoki
awesome thanks Eric ..
have a wonderful weekend …
do you have a YOUTUBE CHANNEL
.mo & the girls
@ gaffer girls – yes, I do but its nothing I’m proud of. LOL the videos are terrible
Thanks for your tutorial. I’ve used the sandblaster at a local stained glass shop. I loved it but would like my own setup. I would need to work outside too. Can you tell me about the equipment you are using? I have a small air compressor already but I’m not sure it is big enough to use for sandblasting.
@ Dawn, I am using a pressure pot sandblaster. Not sure which compressor Im using since I have access to 3 of them.
It depends on the size of the compressor, but if its too small, yo might be only able to use a mini sandblaster which wont let you carve.
Look at the air specification on the side of the air compressor and see if its sufficient for the sandblaster air requirements that you want to buy. Look for CFM, Max PSI, and check out the air tank size. Larger these number- the better though.
Check with your local art museum or university, they may rent time to use their equipment… Toledo Museum of Art charges only $10 per hour to rent the coldworking shop 🙂
Thanks for the info Kelly. Thats awesome. I used to live up near there when I went to BGSU.
Thanks for this great tutorial. I am a lampworker and sanblaster wannabe so will wait with interest for any other tutorials you put out. Many thanks for sharing.
Good! Explained in a very simple way. I would like you to explain how to engrave Half tone image on glass.(from converting the image to sand blasting. Thanks.
That is a nice project. I have done some etching on wine bottles too. There is a market. I am looking forward to more of your work. I like it.
Thank you for your time and knowledge.
Thank you for the nice tutorial – it might be simple to you but for some of us that haven’t done it yet – gives us a nice intro. Thank you for taking the time . . . I want a sandblaster soooooo bad!
I think by the posting everyone has posted here that you can see we’re ready to learn 🙂
Hi, Great work. Sure a booster for beginers like me. Can you specify the grit size of the sand. Thanks
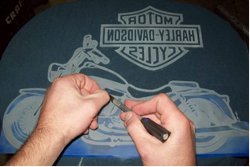
I was curious about the blasting nozzle shown in the third photo. I’ve been trying to find something like that for use in glass etching with a small pressure pot. But I haven’t come across anything like that. Can you point me in the right direction to find one ?
Hi Dave, I made that nozzle. Its a variable nozzle that I made out of inexpensive materials.
I’ll be releasing plans on how to easily make one this spring or summer in my membership site. I just have to get everything together.
Theres that home made gun again Eric, did you do a tutorial on building one yet please?
Hey Tony, good to hear from you and sorry no- not yet. I have priorities to work on first and should get to it soon.
I thought I read from one of the forums that you picked up a PAB blaster. If so how is it? I heard they have a distributor center somewhere across the ocean around there also.
Take care 🙂
This is most useful. I am a complete beginner. My daughter is a designer and will help to design a pattern for a stencil.We need to replace old patterned door glass dating from 1906. Any suggestions about what a glass company that does sandblasting will need from us would be appreciaied
hmmm nice simple and easy..i need more tutorial from you..im here in sorsogon city, Philippines..it is very useful, i need to know more… thanks…
Hello, I would love to see videos showing how to create half tones then the realistic photo sand blasting on glass with the same photo please. I can do regular sand blasting projects and have many completed. But realistic is what I would like to master. Please help, thank you in advance.
H Hughez
I purchased my equipment at SMC, minus the compressor though.
I purchased mine at Lowes and it all works awesome.
H Hughes
Fantastic job. I need more information on designing on glass. Thank you for the info from London, Ontario
What is the best vinyl resist paper to use Vector Tape or Pask brand? What is the difference between the two vinyls? Thanks.
I haven’t used either, so I can’t say. Sorry
I always look forward to your email regarding information on sandblastingetching since I’m new to etching.
I took a course of 2 hours in Yellowknife while visiting my son on etching recyling bottles and since i already do fused glass I will incorporate it in my designs. I bought a sandblasting cabinet along with a bottle cutter and this will be a winter project to be shared with my husband.
Great website. Thanks
hi eric… from one of my friend u came know about glass sandblasting. but i culdnt find, whats the chemical used to mix with the sand. my friend didnt let me know what the chemical is. it will be big help if u giude me to do sandblasting successfully.
The only time I have seen people mix in chemicals was for wet sandblasting, so I am not sure what he was using or why he used a chemical in his abrasive.
ótimas dicas para começar .
Really nice Eric keep them coming.
Still want more on sand carving. Any sand carving you’ve done?
Can u do a tutorial on etching mirrors from the back side of the mirror? I’ve read about but never seen a finished piece of work. Is this a different way to etch mirrors? Are the results more vivid and pronounced.? Really curious about this technique.
Hi John, if you are a member, I have all types of tutorials for etching mirrors here: https://www.glassetchingsecrets.com/member/module-7/
Also, there are sandcarving tutorials.
looking forward to more tutorials.
Thank You
I would love to have a small sandblast gun like the one shown in this tutorial and also to know what media and grit you use. Do you do the actual blasting in a cabinet? Just set up my cabinet and am using fine sand with the Harbor Freight gun supplied with the cabinet. The gun is very sporadic and need to find a new smaller one. Thanks
As always, a great tutorial , i would like to sandblast & see the difference as I do it with a dremmel . I always enjoy your videos too.
I think you may be missing something in you Simple tutorial-I use,what in this country is called Application tape. It’s not as sticky as the vinyl but once applied it keeps everything in place. Then I remove half of the paper backing, cut a thin strip from the backing just removed and reapply it to the back of the vinyl. this allows one to accurately apply the vinyl as there’s only a thin strip of the sticky backing exposed. Ihope this is of some help to beginners!
I am Ratilal starting to learn it, Which material is good for stencil and from where to buy stencils, your guidance will help me lot, can you please give names/links of some stores who supply materials related to sandblasting
LOVED IT!!!!!!! WHAT SIZE TIPS DO YOU USE OR DOES IT MATTER?
very nice and great info..
It’s great it helps alot
Can I ask what kind of cutter would be good to purchase to make my own stencils ? Not real expensive 2 to 3 hundred dollars ?
Eric, that certainly looks simple. How about giving the requirements for the sand blaster and compressor? What is the minimum specs on that equipment ? Thanks, Joe
Thank you for the tutorial! And for not being a chatty patty. Short simple and to the point, perfect.
Very good material! Thank you and I’ll be looking for more in the future.