
My hand won’t fit in that small hole
“So I blew it!”
This helpful tutorial and creative idea was submitted to the blog by Jon Mallory. What an awesome idea to allow you to place patterns/images inside hard to get areas of a glass for engraving! Please read Jon’s tutorial that he provided us below:
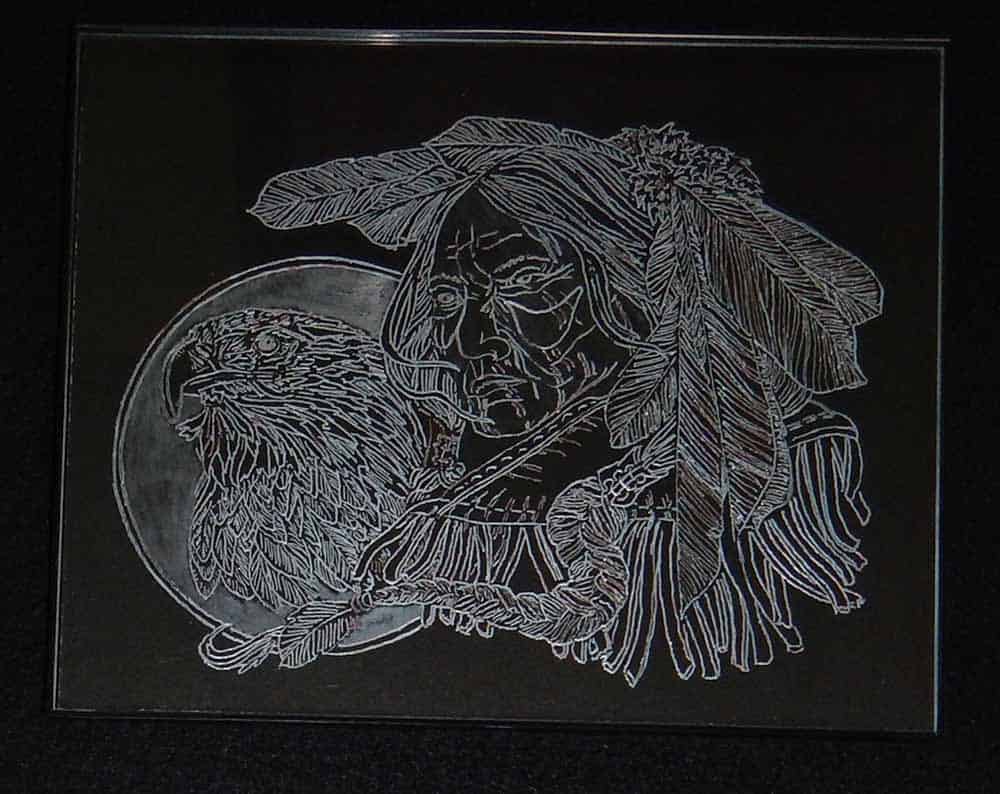
Many times we have a photo that we would like to engrave on a bottle but the neck of the bottle is too small to put the photo into the bottle by hand.
If you have a photo to put into a long neck or funny shaped, small neck bottle, this is how you can do it.
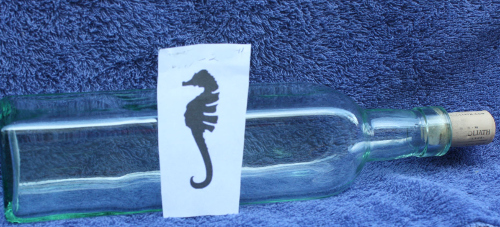
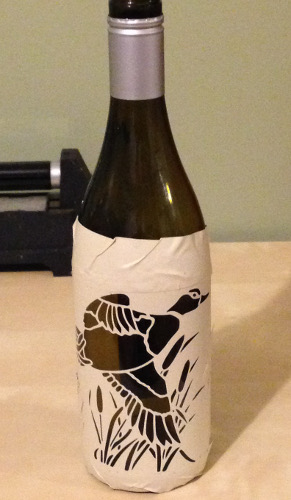
1. Size your photo as if you are going to reach into the bottle and secure it to be traced.
2. Find a tube that will fit the bottleneck loosely. Trim the photo to make it slide into the neck easily. You will have to roll the photo to make it fit.
3. Tape a piece of paper, about 1/2 inch wide, to the top center of the photo that is long enough to position the photo where you want it to be for engraving. Make the paper long enough that you can tape it to the outer edge to the bottleneck when you have it located where you want it.
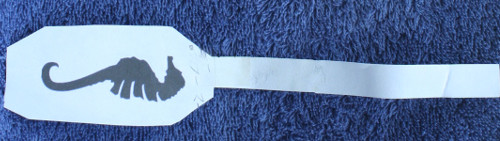
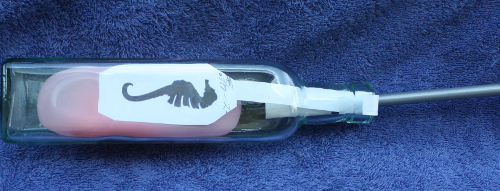
4. Roll the photo, “image out”, so you can see the photo and so it fits in the neck without damaging your photo or the paper tab. Locate the photo where you would like it to be when it is engraved.
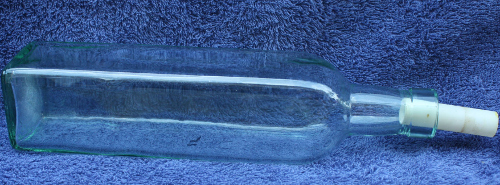
5. Take your loose fitting tube. With electrical tape, attach a balloon to the end that enters the bottle. Make your tube long enough that it will enable you to reach the bottom of the bottle. Your tube must be small enough to allow the balloon and tape easy access inside and to allow the air being replaced by the inflating balloon to escape. Slide the balloon and tube into and behind just beyond the middle of the photo. The balloon must be located beyond the bottleneck so as not to restrict the balloon while it is inflating. This will assure that the photo is tight against the bottle.
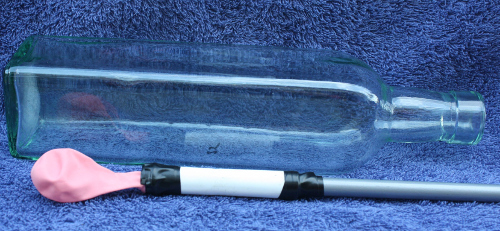
6. Gently inflate the balloon. You may have to remove the air and move the photo, or balloon, if it moves! When the photo is in position and has enough of the balloon in position against the photo to hold the photo in place, twist the tube to lock the air in. You can tape the tube in place if you want to be sure it won’t deflate. Engrave and untwist the tube and you are done!
Share this on social media or email by clicking below!

Wow…this was great. I have struggled with this problem for a long time. Now I know to listen and watch the experts
Thanks Cliff. I wouldn’t need a pattern for a basic picture such as the one I used. I would use it for a photo with more detail. That photo was used for an example!
Very good idea Cliff. I will need to remember this when I have to do something like this. You saved us some head aches!!
Very cool and ingenous idea!!! thanks so much for sharing!!
Thanks for sharing your ideas and the way you do things helps so much I dont have to pull my hair out
Thanks for sharing can’t wait to try it out.
I’m not sure if I get the reason for this. I don’t understand why you can’t just glue or tape the pattern on the outside of the bottle?
@Doug, this is meant to be for rotary engraving. Although you may have found something that works better for you, it is usually a best practice to place the pattern behind the glass for an engraver to trace so the paper doesn’t interfere. Much cleaner too!
That is so cool great idea now I’ve got to try it Thanks for sharing
Thanks for the very useful tip
verry clever and helpful,thanks Eric Robert
well you`ve lit the fuse ill see where it take`s me.
many thanks
@gilberte, I am just relaying the information. Thank Jon Mallory
Thanks to all the kind comment about the photo in the bottle.
You all are gonna have me going wild with some of these projects I have to try.
Great job. I would normally use blue carbon paper to trace the pattern directly onto the bottle. However some of the lines do not stand out as clearly as I would like. With this technique, the pattern will be much clearer. Thank you.
Where can I get balloons small enough to inflate. The balloons I used were hard to inflate and wouldn’t hold the air. More like party balloons that must be inflated fully. .
Thank you for the positioning idea for a stencil. I positioned a drawing on the inside of a wine glass. Once I got it centered, I used tape to secure it to the glass on the inside. I set the glass on a piece of foam so it would be easy to maneuver and handle and proceeded to engrave . Came out beautifully. Mush easier than I was doing it before and the result was delightful. Thank you.