
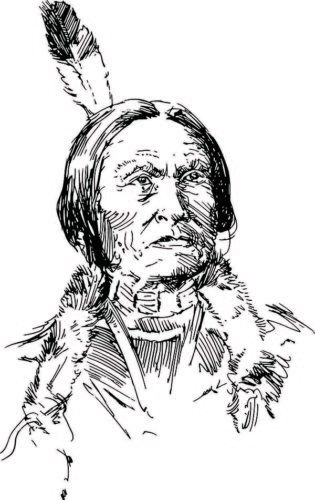
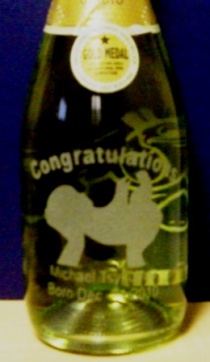
Uwe Schwenk was nice enough to write up a great tutorial on how to rotary engrave glass for all of us. Thank you, Uwe! Uwe shared the below project on how it was engraved using a native American warrior pattern on regular glass and colored it.
This particular project is part of a series of depicting Native American images.
Determining the size
The size selected for this series is to be framed in 8 by 10 inches picture frames. The size of the artwork was based on a few considerations:
- People like art but they are limited in their endeavor by space.
- If someone wants a series of art pieces to display on a wall, they should be able to do so for their enjoyment.
- Glass engravings are different in as far as color is concerned. The backing brings out the engraving.
Selecting the designs
One of the great challenges in any glass engraving project consists in the fact that engravers often have to adapt the design to the glass instead of the glass being adapted to the design. While this is not an issue if you have your own kiln, that’s not always an option.
For this particular series, the size selected was to fit it into an 8 inch by 10 Inch frame. Having finalized the size, I am now able to actually start looking into the designs, that I would like to bring to life.
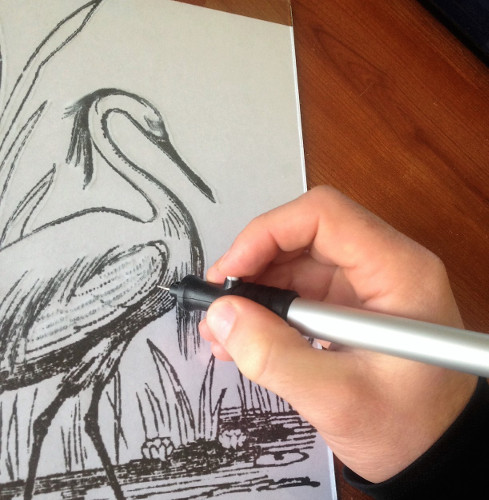
Having decided on the actual image to be engraved for the first engraving, the image was flipped for engraving from behind, aka under-glass engraving.
Now that these early decisions have been made, the actual engraving can start.
After placing the image under the glass (I actually like to use a clipboard for this where the image and the glass are fixed). I started the engraving of the image in reverse. Additionally, I tape the image to the glass but only on one edge and leave enough space so I can flip it on the other side when I look at the image how it will be in the final.
 Burrs used for Engraving
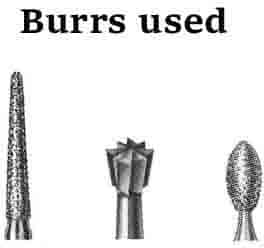 Burrs used for Engraving
For the actual engraving there were only 3 burrs used:
- A Pencil Point Diamond for the Outline.
- The Inverted Cone Carbide for all lines.
- A football Diamond for shading some of the areas.
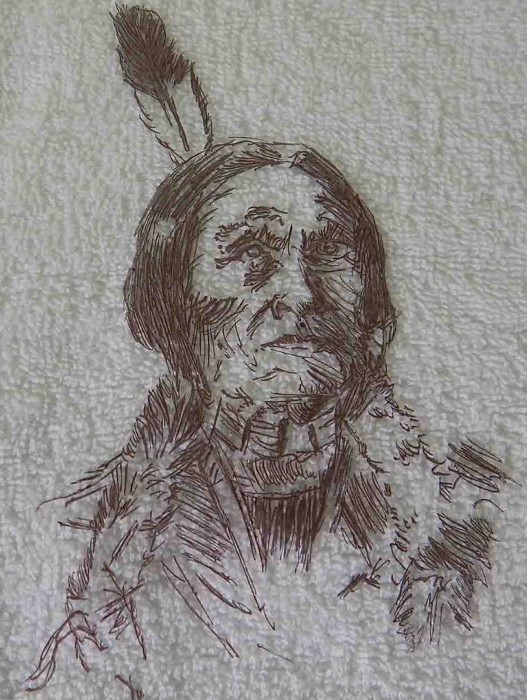
While the engraving was checked often, I also checked it against a black background repeatedly, to get a better view on my lines as shown in the following image.

Polishing the Engraving
Prior to the actual polishing, I took a metal brush and then a nylon brush to the engraved parts to remove all pieces of loose glass from the engraving. The metal as well as the nylon brush are shaped like a toothbrush (that’s what the nylon one was) and the metal one comes from a firearm cleaning kit.
After this was done, the engraving was washed off and dried.
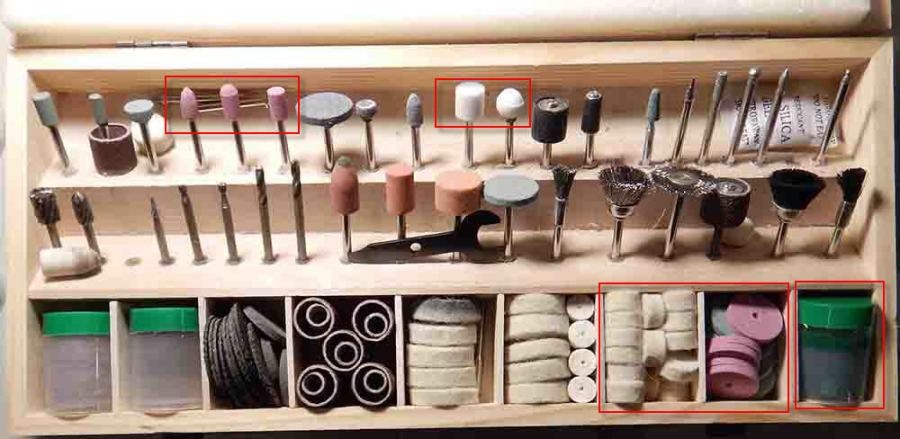
I then proceeded to the actual polishing. For this I used the bits and buffing paste highlighted in the following image with a red frame.
Finalizing the Engraving
My Goal in presenting the engraving consisted in something simple yet elegant. This is best achieved with a white background and a simple brown frame. Therefore, I decided not to use glass paint but rather rub N Buff as enhancement for the engraving. After experimenting with some of the different colors (if you don’t like it, Rub N Buff can be removed with nail polish remover). I came up with the following solution.
After trying out brown, it did not quite look as good as I thought it would. See the example below.
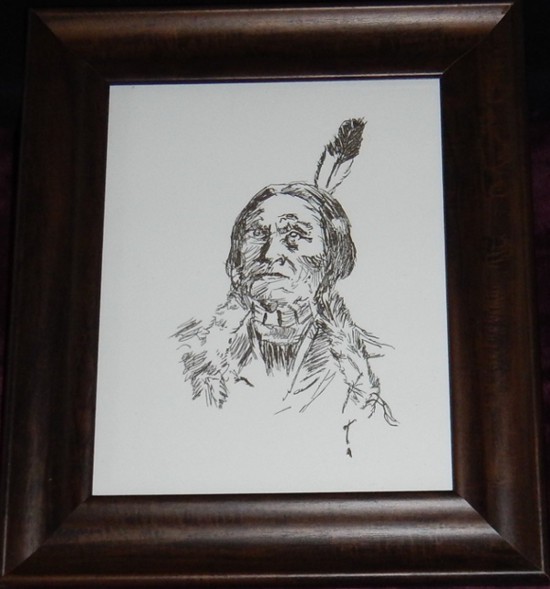
Since black shows up as black and the glass has a slight green tint, I decided on the use of Spanish Copper, which gives me an excellent result for the final on a white background. Below you will see the look on a black background. This is mainly meant for demonstration, so you see the different impacts a background can have.
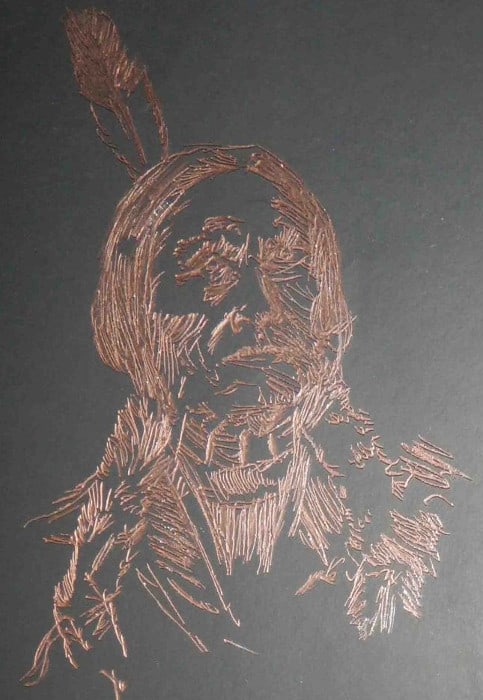
The final result with the Spanish copper on a white background is as follows.
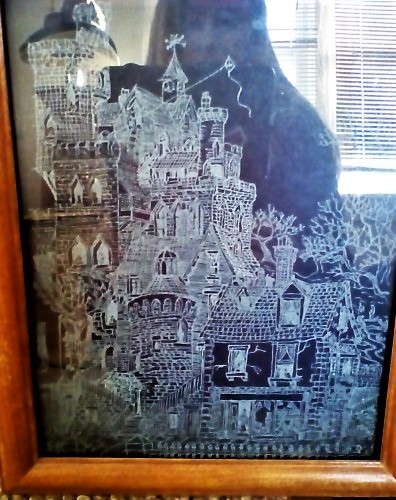
Other Engravings
Finally, I would like to add a few other engravings from this series below. All engravings in this series are in an 8 by 10 format
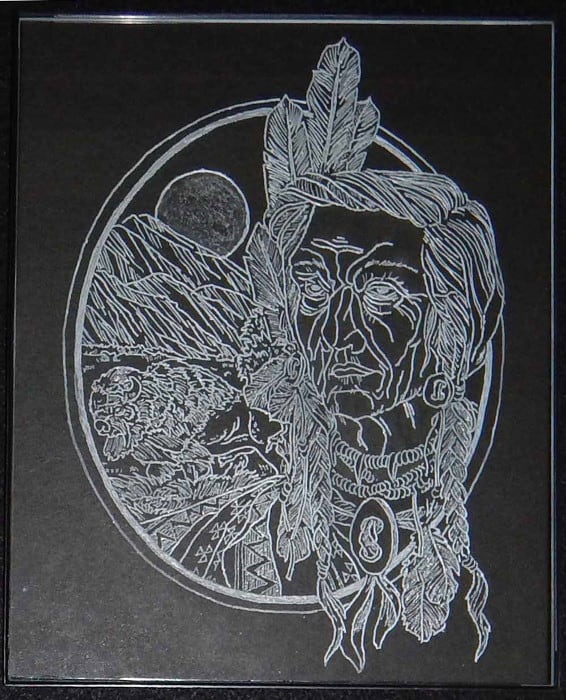
The Buffalo spirit not colored. Just engraved and very lightly polished.
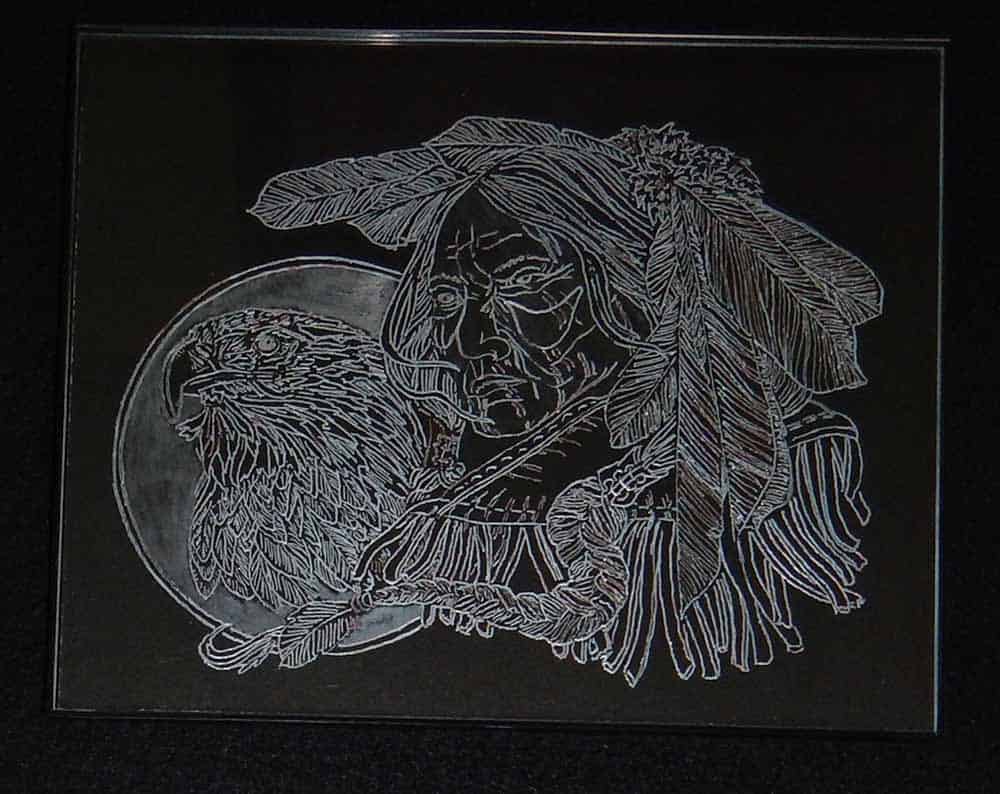
The eagle spirit under glass engraved with brown and silver Rub n Buff to accentuate. This engraving actually won 1st prize in the 2018 Delphi Online Art festival in its category.
Thank you so much for sharing, Uwe! If you appreciated this too, please leave Uwe a comment below and ask us any questions. Uwe is online at the below:
Etsy Store: https://www.etsy.com/shop/HandEngraveGlass/
Share this on social media or email by clicking below!

Superb good idea. i like it. nice one
You are welcome
Very nice. I have yet to try rotary, but this is encouraging. Thank you for sharing.
Thank you Doug!