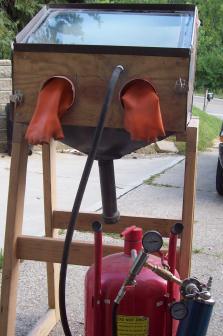
Since many of us prefer using a pressure pot sandblaster instead of the siphon system included with blast cabinets, this post will discuss how to change it. As you may know, the benefit to using the pressure pot is:
- Deep sandcarving capabilities– the pressure pot is essential to sand etching deep into the glass with 2 stage or multi-stage techniques.
- More efficient– the pressure pot uses the air compressor more effectively.
How to Change Cabinet from Siphon to Pressure Pot Hose
Use Pressure Pot Only- If you do not plan on using the siphon system, you can remove it. Usually the right side of the cabinet will have an air hose coupler threaded into a hole. Using a wrench on each side, simply loosen this and pull it out of the hole.
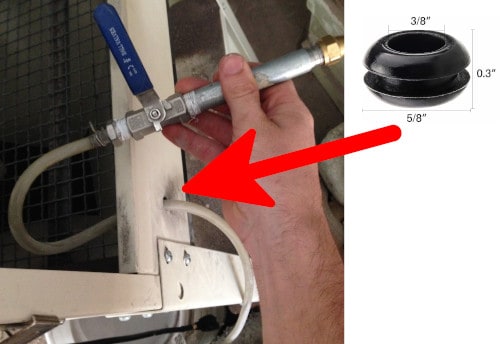
Keep Siphon System + Pressure Pot- If you would like to use both the pressure pot and the siphon system inside the cabinet, you can also drill a new hole.
After you have a hole, then you can slide your pressure pot hose through and connect the nozzle to the hose inside. Our pressure pot nozzle & mini hose kits have a small enough hose to fit through the hole. However, you will need to enlarge the hole with a drill bit if you use larger abrasive hoses. The small hoses like the ones provided in our kits are a popular size for many glass etchers because it reduces the abrasive and air volume to a more preferred amount to the nozzle. The smaller hose is also preferred because it is less cumbersome, lightweight and easier to move around inside the cabinet. Overall, this smaller size works out well for artistic etching that commonly uses the smaller nozzle tip ID sizes such as 1/16″, 3/32″ and 1/8″.
As an FYI, you may want to further seal the hole around the hose by also sliding a rubber grommet over the hose as shown in the picture above. I didn’t worry about it but is a good idea to prevent abrasive from leaking out and protects the hose from any sharp edges (which is more common if you self drilled the hole).
Removing Abrasive Hose from Barbed Fitting
Whether you use our kit or have your own, you will eventually need to remove the hose from the barbed fitting on the nozzle. You’ll need to remove the hose to replace it or to slide it through the cabinet hole.
Please note: if you order our kits and would like me to ship it without the hose connected to the nozzle, please let me know after ordering it. I can ship the nozzle and hose disconnected so you can slide the hose through.
If you did receive the hose and nozzle connected, the below pictures show how to best remove the hose from the barbed fitting. It’s best to just cut the hose in front of the barbed fitting and cutting a perpendicular line to remove it. You will only be losing about a 3/4″ piece of hose.
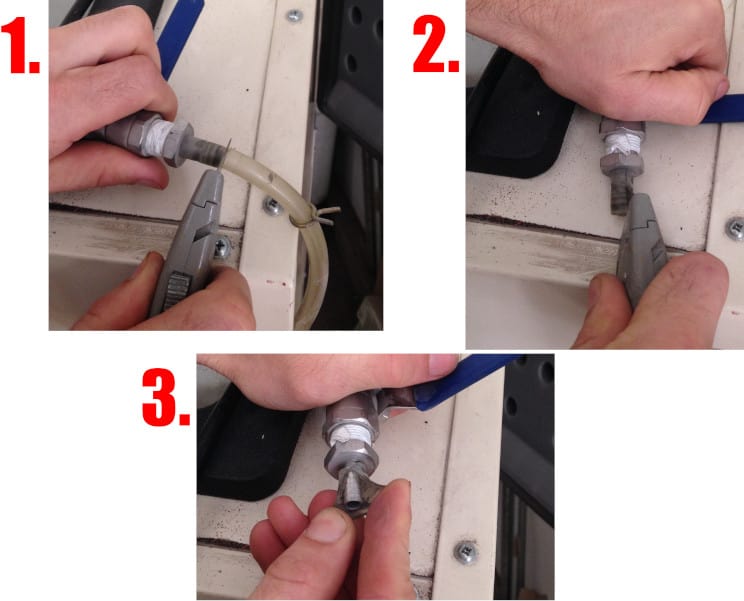
Once the hose is removed from the nozzle barbed fitting, remove the hose clamp, then slide the hose through the cabinet. With the hose inside the cabinet, slide the hose clamp back and push the nozzle barbed fitting back into the hose. Position the clamp back and tighten.
How to Make Hose Easy to Put Back On
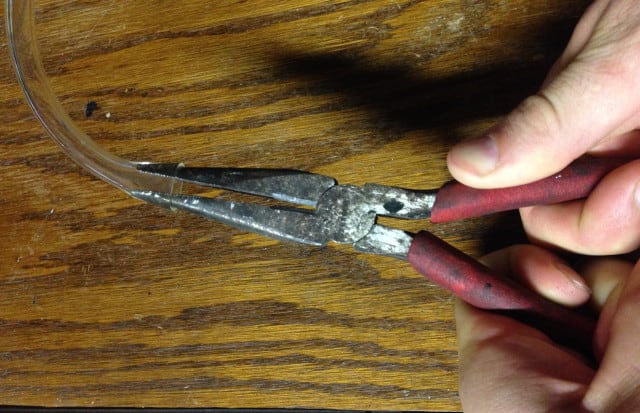
The hose can be difficult to push back on the barbed fitting. I suggest you open the hose end up with needle nose plies as I have done below or warm it up with a lighter or heat tool. You will have to push the hose over the barbed fitting within a couple seconds after or it may still be difficult.
If you have any further questions, please let me know below.
Share this on social media or email by clicking below!