
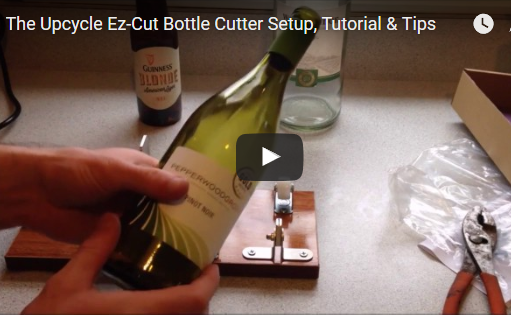
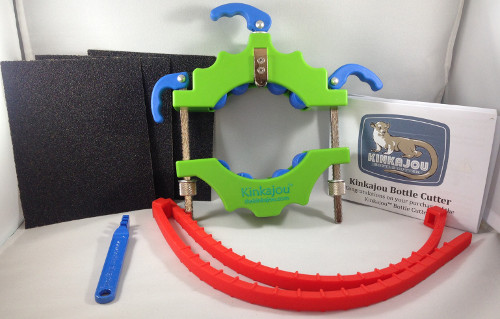
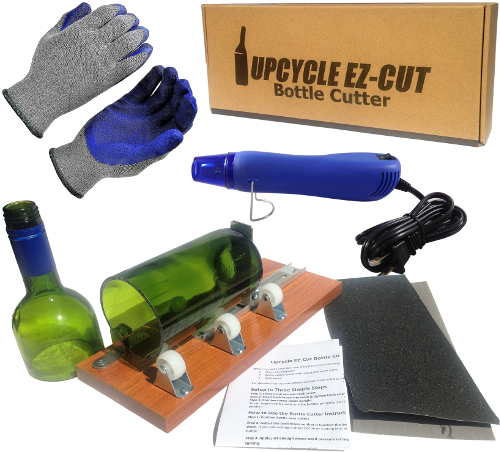
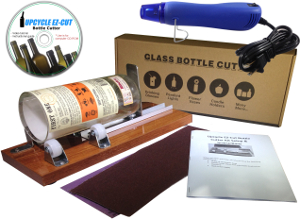
Today I wanted to show you how to cut a wine bottle with the Kinkajou bottle cutter which is now sold on our website. Also see our branded bottle cutters with the Basic kit, Deluxe kit, Ultimate Kit and more on Amazon. This came out a few years ago. It’s relatively newer and really a pretty cool concept that makes cutting your bottles a lot easier.

Steps to Use the Kinkajou Cutter
1. Loosen Nuts & Place Over Bottle. So to start off, you basically have to loosen the nuts so you can get the cutter around the bottle.
2. Tighten Nuts. Then once it’s in place where you want it, tighten both nuts evenly until it kind of stays in place. You also want to make sure that your labels are removed but for demonstration purposes, I cut below the line.
3. Engage Tightening Levers. After the nuts are tightened, push down the levers on each side to make a tight. You want to make sure you can move it around easily. If it’s a little bit too tough it can sometimes twist it and mess up the score line.
4. Engage Cutter Lever & Cut Around Bottle. Once you’re ready to cut, you just put this lever down to engage the blade. They suggest that you hold the cutter and turn the bottle. You want to turn it just one cycle around the bottle until it reaches the finish line. You can usually hear a crack noise once it reaches the end. They do suggest that you don’t go around it more than once because it can mess up your blade.
5. Lift the cutter off, loosen the levers and pull it off.
6. Make sure your score lines are okay.
7. Place Ties Around Score Line. Then you want to grab the ties that they give you and place them around the top and bottom of a scoreline. These help contain the hot and cold water within this score line so it separates better. They suggest you have it about a half inch at the max away from your score line.
8. Pour Hot Water. Once that’s ready, you want to grab your hot water. It should be almost near boiling and try to aim it within this line.
9. Pour Cold Water & Separate. Then you want to run your cold water over it and then separate.
My Review
In my opinion, it is a cool bottle cutter but am not as impressed as I thought I would be. Aesthetically it is brilliant and easy, but does seem like it takes a little bit more practice than my homemade bottler cutter. I’ve only tried this a few times and I’m not perfect at it yet as you can see here. I think if you changed the glass cutter with a more superior version, it would work great.
There’s a little bit of learning curve and it did not make the cut perfect so it’s not a perfect system. The great thing about it is how easy it is to use.
If you have any questions about this just leave a comment below. You can order these on the website here and I will include a free copy of my How to Etch ebook on CD-ROM with the free patterns.
Share this on social media or email by clicking below!
I was wondering if you know how to drill a hole in a piece of glass?
Wanda
They do have drill to drill glass do a google search
Wanda, good question. As Paul says there is. It is a special type of drill bit you can use. I have thought about doing a post on it.
Which type of blade is used to cut bottle
Manju, you have to use a glass cutter but get a quality one and it will cut better. I wrote free plans on how to make one that everyone can download here: https://www.glassetchingsecrets.com/blog/home-made-bottle-cutter/
I have tried this bottle cutter & achived a 16 percent success rate,so put it with other so call easy to use cutters.
Greetings. I am from the Philippines. How much is this bottle cutter so that I can request a relative to buy one if it is not too expensive. Thank you.
@Stan, yes I am not having too much success with it either but I have only tried it a few times. If you make a home made cutter like I have in my free plans and use a good cutter, it seems to work great. I’m not sure if I want to continue offering these for sale any longer after my stock is out. Pretty cool device though.
@Agnes, the MSRP is $49.99 but we only ship to the US. Sorry about that.
superb its amazing
I am having a hard time getting the cutter to stay level as I’m tightening it. Any suggestions?