
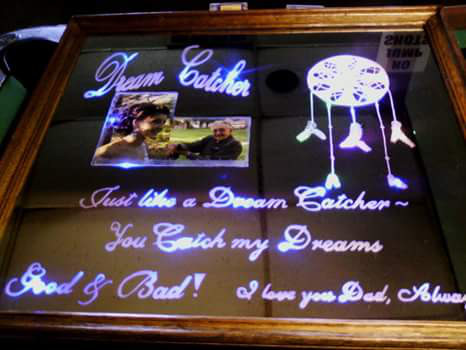
Awesome idea of using a photograph in her mirror engraving project.
Dana Long shared these photos of mirrors engraved from the back side and lit up with LED lights for both businesses and personalized gifts. She stated they were done with the Dremel tool which is another way to get through the painting and silver backing in addition to ways I mentioned in using the sandblasting or chemicals.
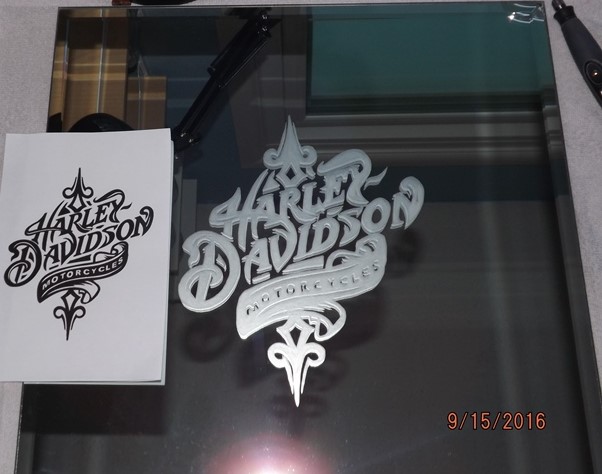
Not only have I never talked much about using a rotary engraver to do this, but her work also brings up a new idea that I haven’t seen by integrating an actual photo into the project which is behind the glass mirror. She told me she used a dremel rubber bit to remove the backside. To remove the mirror backing, you might be able to use the chemical process to cut it out for photos to shine through or by making her own mirror as talked about in the member’s area.
Either way, this is such a cool idea to create a personalized gift! It appears the led behind the mirror even outlines the photograph.
Her other projects shown below are just as cool. She also shared these brief details:
Engraving mirrors and glass. Photographs or personalized pictures for individuals and / or business owners. Plus secret feature…. Lighted and colored.
In the left example, she engraved a mirror sign behind a mirror, then added led lights to light it up. Much better and artistic than those neon light signs, wouldn’t you agree?
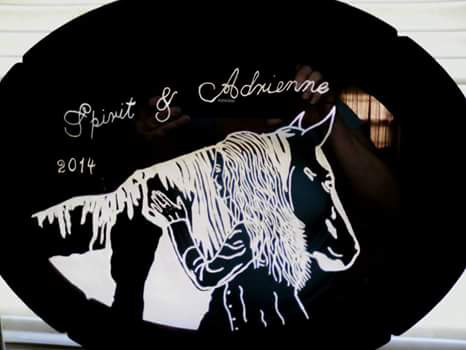
Example on the right shows a personalized engraving in an decorative oval mirror of a horse and owner. Great gift idea for pet and animal owners!
I want to personally thank Dana for sharing her work and ideas. If you have any questions or would like to leave some comment love, please do so below. Thank you all!
Share this on social media or email by clicking below!

Great idea and workmanship. Can you share anymore info about how you light the mirrors.
Thank you and again great work.
We also do pictures in mirrors. Because of proprietary reasons, I won’t share what we use to remove the backing, but we use a vinyl plotter to set the design, a glass bead pressure blaster to engrave the design, and special chemicals after soda blasting, to remove the actual backing. I love the idea of using LEDs to make it like a sign. Very cool to do this with a dremel, but I fear our way is much easier, probably cheaper, and more user friendly. Last year, we averaged 10 mirrors per week using both the blasters and chemicals for a 16 week run, before we got bored with it. Each custom mirror sold for $35.00 each and where 12×12 mirrors, framed in a home made wood frame.
I want to learn this so bad. I have the dremel and mirrors, just have to try. THANKS
Dana, you have shown a Great piece of work. I was toying with the idea of doing etchings like this, but never quite figured it out. Great Work!!! I’ll stick to my glass etchings and we will both continue to “WOW” our audiences. Thank you so much for sharing.
wow that is just awesome ..
Great job, I must try it ! One thing I don’t understand – perhaps I am too thick ! – what exactly do you mean by “engraved a mirror sign behind a mirror” ?
Thanks Roy
Looks brill gives me some ideas,
@Roy, thanks for asking- I should probably update it and it does sound confusing. I basically meant to say the mirror was engraved from the backside, rather than the front and can be used as a business sign.
Please let us know how you light that design
Hi! This is Dana. Thank you all for the kind words. I absolutely love engraving mirrors glass windows… you name it. I only use my rotary tool with a wide variety of dremel bits. Those of you who asked about how I light the design.? My biggest problem has always been finding the right frame. But I have battery operated led fairy lights that I place between the backside of the mirror and the actual back of the picture frame.
THANKS,ERIC
Dana,
Thanks for sharing further details with us all! I’ve never tested or even heard much about fairy lights- only the led strips. Please correct me if I’m wrong if this isn’t the right product, but if folks want to try these out, I looked these up and found some here: http://amzn.to/2io7zRJ
They come in 6 different colors and are fairly inexpensive too!
Great idea sir.
Your ideas are always very innovative
Sir i want to know how you engraved glass from back side. Which chemical you used for this?
@aaditya, I use sandblasting and Dana used rotary engraving. However, I made a write up about how it might be possible to remove the backside with chemicals as pointed out in the link in the article.
I hope never seen a rubber head for a dremal wher can I pick up one?