
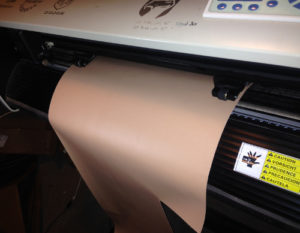
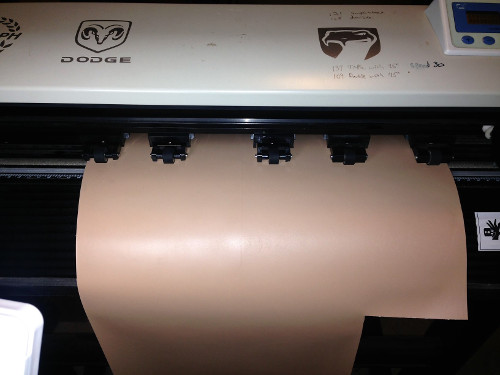
Example of my vinyl cutter with 2 pinch rollers. A lot of middle ground exposed to bulging up!
In another way to explain it, while the vinyl cutter is moving along, doing its task, the blade then kinks up the vinyl which should have been flat. Anyone had this problem?
If this happens to you also, the reason behind it is:
- High Force Blade Setting or Thick Material is Being Cut– The thicker the material you are trying to cut, the higher the down force setting you need to configure to allow the blade to cut all the way through. The problem is the blade is pushing down hard into the vinyl while moving. Many times this force causes the vinyl sheet to bow up which gets caught in the blade. Since many of us sandcarve with thick sandmask stencil material, we are more likely to have this issue even when using a 60 degree blade. But even thinner stencils sometimes have this problem.
- Not Enough Structure in the Vinyl– To go along with the previous point, part of the problem is most vinyl or sandmask materials don’t have enough structure, causing it to bend easily when put under a forceful blade moving quickly. If the structure of the vinyl or its backing paper was stiffer, this problem probably wouldn’t arise.
- Not Enough Rollers- Another point which also leads me onto my suggested logical solution is some cutters just don’t have enough rollers to hold down the vinyl.
- If you ordered the Glass Etching Secrets ebook, you should know I recommended some value cutters that worked great for the most part. However, only 2 rollers are provided to hold down the vinyl in place (I believe most have 3). They marketed these newer models as a benefit, for some reason, with a design that allows an opposite aimed fan to create a suction which helps hold down the center of the vinyl. The two outer rollers kept the vinyl on track.
- Since there is no roller positioned in the middle, there is more of a likelihood for the vinyl to bow up.
Solution: Add More Vinyl Cutter Rollers
So if you do have this problem or cut thick sand masks, I found out that adding more rollers is a great solution to fix the problem of vinyl getting jammed. Rollers are both economical and easy to install more many units.
Where to Get Additional Rollers
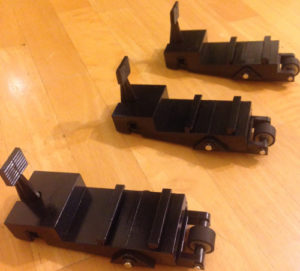
I searched around at various websites for additional rollers for my vinyl cutter model. I found out that Ebay.com not only had the largest selection of vinyl cutter parts, but they also had the rollers listed at the lowest prices.
The listing I ordered from priced each roller at only $13.65 with free shipping from China. I probably only needed one or two, but since the price was fair, I decided to play it safe and get 3 of them. The total was less than $41.
How Many Pinch Rollers Do I Need?
I think it depends on how wide your cutter is and how flimsy the material is that you will cut. To give you my thoughts, I have a 24″ wide cutter and use a 22 mil thick sandmask that is 15″ wide. Though I ordered 3 extra rollers for a total of 5 on my cutter, I think 4 total would be plenty- but only 3 might be fine too. I would just be safe and use 4 total.
Easy Installation of Pinch Rollers
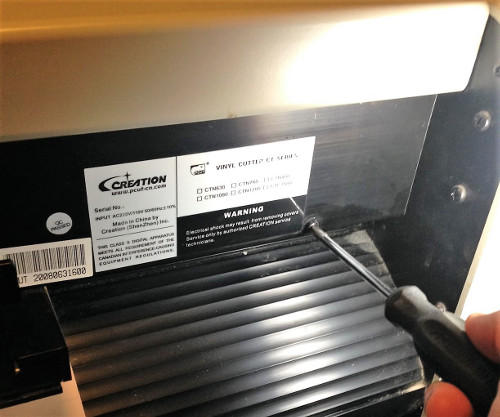
As I explained earlier, it was super quick and easy to add my additional pinch rollers! However, the process may vary for other brands. I originally thought I had to take the whole cutter apart to install them- but nope! All I had to do was remove a small screw on the back left side of the cutter. The screw served as a stop in the track which held the pinch rollers. Undoing the screw simply exposed an open area in the track which allowed me to align the new rollers up and slide them down the track one by one.
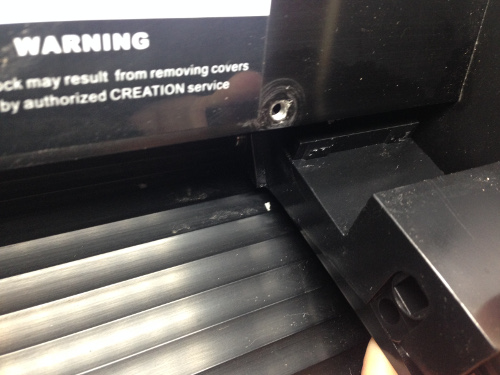
To do this, I tilted the front side of the pinch roller assembly up into the track, then positioned the back end up and slid it down. Be sure to use to apply some sort of grease like silicon or vaseline on the pinch roller assembly track, or else it will be tough to slide.
This Solution Helped Me!
5 rollers holding down sandmask. However 4 is probably sufficient.
As you can see from my photo, I now have a total of 5 pinch rollers holding down my sandmask about every couple inches and less problems! I am so glad I finally got around to trying this. Please let me know if have problems with your vinyl bulging up in the comments below. I am interested to see if this helps anyone also.
A view of the back side with the 5 roller tabs.

Share this on social media or email by clicking below!

That is very helpful. Just a note I have an Enduracut2 that I am selling used once still in box 495.00 209 483 3962. Thank you
I also use a vinyl cutter with various vinyl thickness. I have learned that another way to avoid the vinyl not to bow up is reducing the speed on your cutter. This gives the blade enough time to make the corner and sharp turns which normally are the cuts that make your vinyl bow up. And yes the extra rollers are a big help also. Hope this information helps.
Gilly
Royal Blast SCI Dallas
I have only found my vinyl bunching up when I’m cutting long lengths and don’t align it correctly.
Hi,
To create a good job you need to unroll vinyl on the cutter to obtain free motion and pull vinyl from roll.
Also you need a 60 degrees blade and use an offset blade value.
Also slow speed give better result slow as much is possible 1cm or 2cm
Extra pinch roll depend width of material use. China cutter like Creation or any China cutter cannot offer good tracking like Graphtec or similar Japanese cutter you pay 5 time less long length tracking depend machine quality and speed to cut slow speed and good alignement also before to cut you can use the machine keyboard to push in and out the material this made in the stencil like rail and help tracking.
Regards,
YR
@ Gilly, that is a good point that I should have added. I’ve found this to help but it still bundles it up at times for me. Thanks
@Yvon, excellent advice ! I appreciate it. I’ve read that a 45° blade typically uses a .30 mm offset, and a 60° blade uses an offset higher than the 45°.
I just realized I mistakenly stated I use a 45° blade when I meant 60° blade. I’ll update my post.
Thanks all for the great tips.
.
what is a good Sandblasting Mask to use for Sandblasting Granite for headstones
what thickness should I use.?