
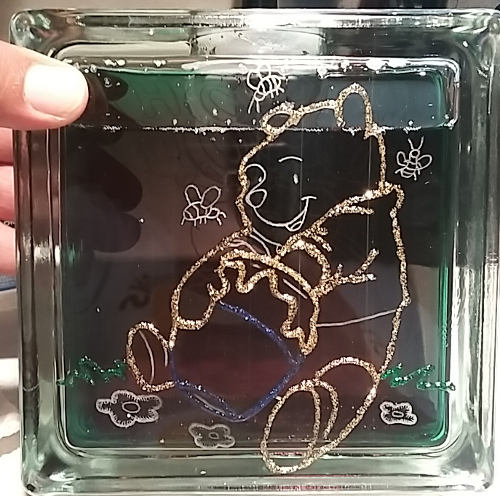
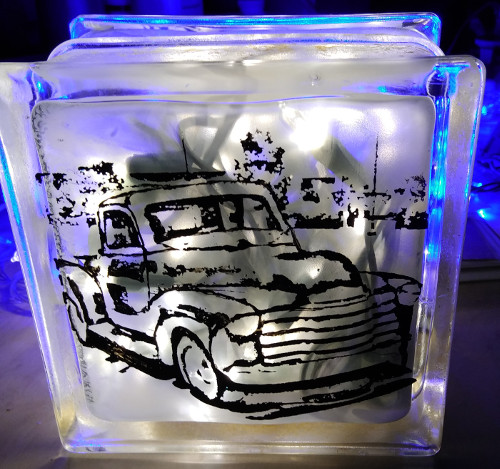
Cynthia’s custom etched glass block craft project of Winnie the Pooh.
Making DIY decorative glass block crafts are a growing idea to personalize, and etching them is one of the best ways to accomplish this. This time she etched them with Winnie the Pooh designs and experimented with glitter sticks and watercolors to make a light colored glass blocks.
She provided the below details!
This is a 5 pound glass block. I found and scaled the design I wanted for a customer, transferred the design onto the glass using transfer paper and then etched each design on each side. I purchased glitter sticks and strategically put some glitter to outline it but also left some of the etched lines bare without glitter. It adds an awesome color illusion without consuming the essence of the etching, and when the glitter completely dries, you can still see the etching!
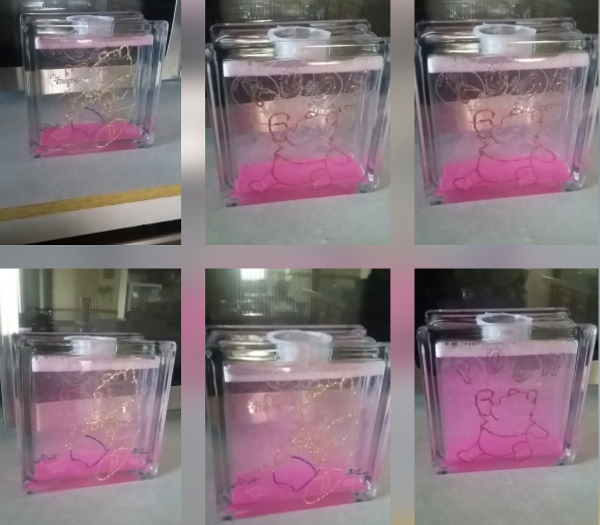
I played around with some water colors as well. The one picture shows a green colored water with some silver glitter inside. It can be shaken and looks awesome, like a sensory bottle! The other picture shows a different color scheme: clear water, clear Elmer’s glue and neon pink glitter. This option turned out awesome as well.
The first image below shows a collage of the steps she took to etch and decorate the above glass block and the second shows another Winnie the Pooh project she worked on.
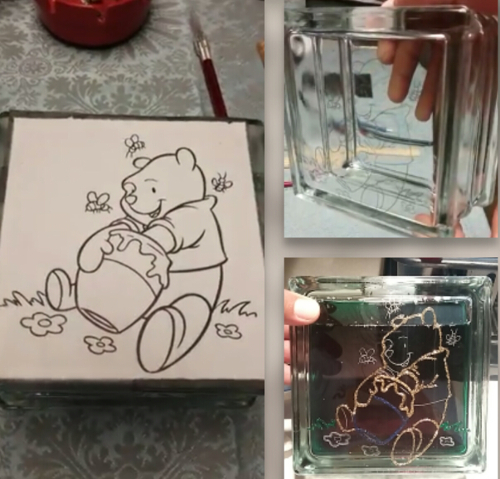
Instructional steps she took from outlining the stencil to etching it and finishing it.
Collage of another glass block project.
Thank you for posting more interesting projects, Cynthia! If anyone has any questions for her, please leave them below or just leave some comment love!
Share this on social media or email by clicking below!

I am at this etching and sandblasting as well as stained glass
I like it
Great looking
Thanks all…more glass block ideas coming!! My next etching project is a fish tank!!
Lovely work, great idea.
Do you use a high speed engraver to do any of this work?
Awesome.
Very Nice!
Hi A great project. But I think I am missing something ?
You said “then etched each design on each side” can you please explain what exactly you mean ( each side) ?
Thanks
Roy
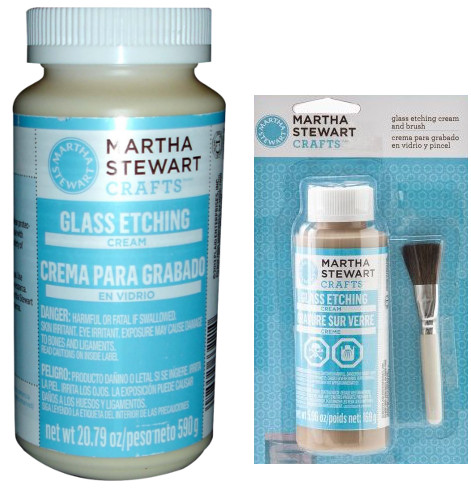
What is the best abrasive to use for sandblasting/etching glass and where do I purchase? New to all this. Thank you in advance.
Lovely!
That is very nice!
This is very interesting and effective, but your glass looks more like bottles than blocks. Where do you get the bottles/blocks? I am in the UK.
Hello All and thanks for your feedback. Let’s see, I use a dremel 3000 with a flex shaft. Glen, the glass in this project IS a glass block and NOT a glass bottle. It’s a square in shape and can be filled with sand or water or any filler. Roy, when I said I had to “etch each design on each side” its because there are two sides to the glass block and then it was filled with water and glitter. Colored water allows you to see each design clearly on each side. Clear water allows you to see through one side and see the etched design on the other side without having to turn it around. I do not sandblast at all. I only use armour etch cream with some lettering. I taught myself the hardest way to do glass etching, which is with a steady hand and a rotary drill lol. I use a soapy mixed water bottle with all my diamond tipped burrs, as this helps preserve the burrs. The burrs I use everyday are on Amazon, called diamond tipped burrs. You get a set of about 20 different burrs for less than $15. I hope this has answered everyone’s questions and please feel free to ask more!
The pictures I provided shows how it looks with dark colored water and clear water with pink glitter. When done, these weigh about 10 pounds lol