
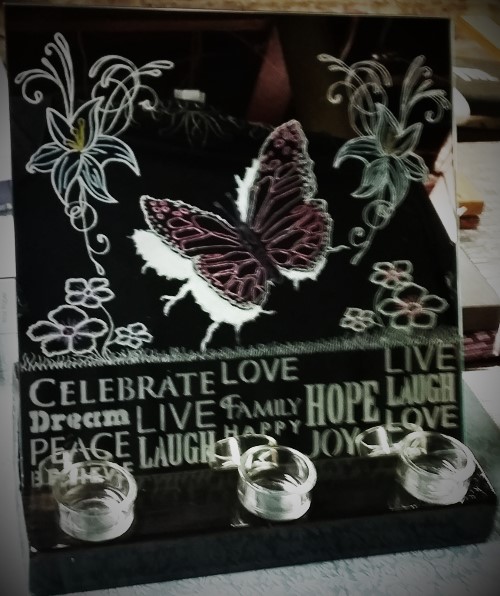
The etched 12 x 12 mirror tile shows a 3D butterfly breaking out of concrete, and flowers, grass, and word templates. I also figured out how to incorporate color into the etched glass!
It looks like she also did this by mixing techniques of Armour Etching cream with rotary engraving.
In addition to her DIY tea light candle holder and marker idea, Cynthia’s etchings combined with flowers, a butterfly and happy-minded words makes an excellent homemade decor item! She provided the below details about this project:
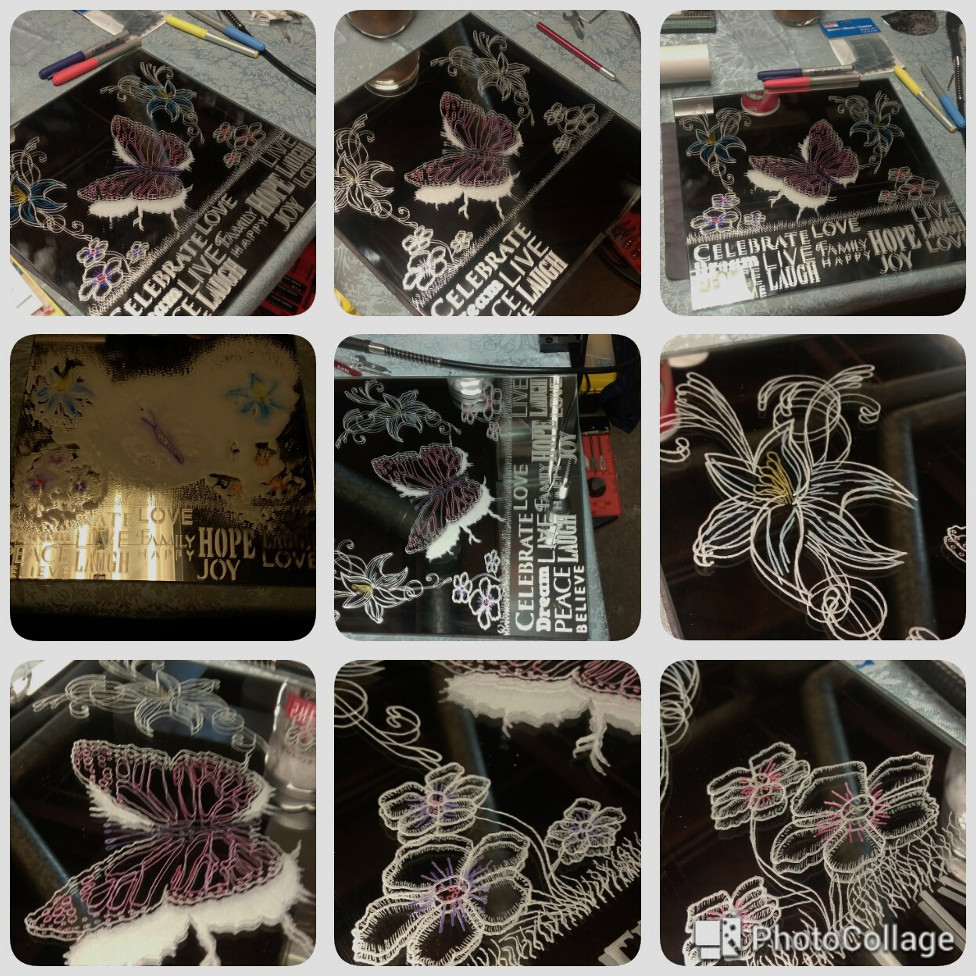
This is a 12 x 12 mirror tile that I etched a 3D butterfly onto, with flowers and grass and also used armour etch cream for the word templates at the bottom. I’ve tried to incorporate color into my etching several times but this time I came up with my own method of adding color to my glass etching….fine tip markers! I colored it in and let it dry. Then, I used Dirtex and sprayed the whole glass tile and you can see the excess color lift. Once I wiped it clean, the hints of color that I strategically placed throughout, can be seen. Not too much and not too little. Came out awesome!
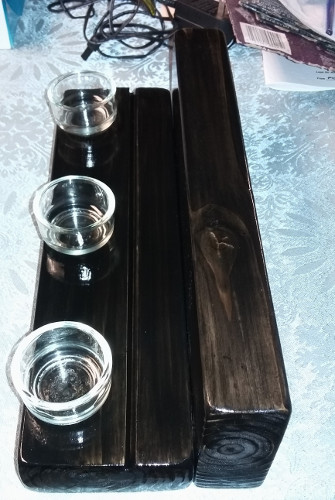
A handmade black glossy finish stand and glass tealights candle holder.
How to Make a Candle Holder
To make something similar to Cynthia’s candle holder, I wrote up some rough instructions below.
- Cut two 2×4″ boards about 14″ inches long.
- Purchase 3-4 tealights or votive with a chamfered design (bottom is a smaller diameter than top which is important for the hole to hold the candles).
- Measure the mid-section diameter of the tealight and find a hole saw of equal width.
- Mark equal distance for these holes to be on one board near the edge and drill out the holes with the hole saw.
- Near the back of this board, saw out a slit longways across.
- Place the other board behind this so that it is in a “L” shape and use three screws to hold them together.
- Stain the board to your color preference.
- Etch the glass tile to your preference.
- Place the tealights in the holes and use a mirror tile for the insert.
Click the photo to see an enlarged version.
Thank you so much for sharing Cynthia! If any one else enjoyed her post or have questions, please leave a comment below. She also shared a collage of photos showing a summation of the whole etching and coloring process.
Share this on social media or email by clicking below!
Looks great !! Did you use a rotary engraver on any of your project?, and if so on what parts.
@ Kevin Retelle, yes I did include in the description that I used armour etch cream and a rotary drill. The look of armour etch cream and a rotary drill are really different. In this project, I used a rotary drill on the 3D butterfly and all the flowers and grass, pretty much everything above the inspirational words was done with a drill. Thank you for asking!!!
Thanks for your positive feedback!!!! More projects to come!
Cynthia, nicely done. Inspires me to think harder about trying to do something with this concept.
Thanks David!!!
Looks very detailed and stylish.
Thank you Doug! Yes, there was some time detailing it, but the glass piece only took a couple hours. It’s the handmade stained wooden candle holder that took two days to properly sand, drill and stain lol
Great
I am curios. You state using a rotary drill. Is this the same type of drill that you drill holes into wood and metal…etc.? I am a little confused but when you are my age confusion comes easily. I have SMC engraving equipment but the only rotary drill I have are the ones I drill holes with.
Thanks
Ed, you are correct but it all depends on the speed of the drill. I use a Drexel 3000 with a flex shaft so that when I drill, it feels like I’m holding a pen and there’s more control, especially when doing skinny lines and detailing. I use a separate black and decker drill when creating g my handmade stained wood holders though. Thank you!!
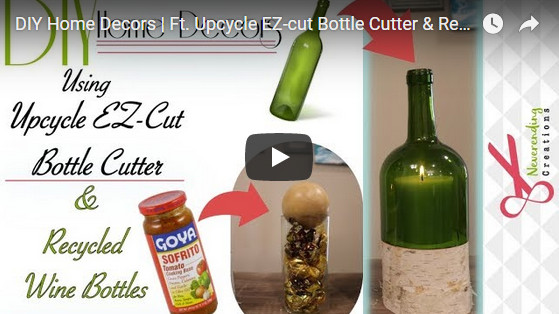
These DIY candle holders are a wonderful upcycle project made from plastic soda bottles. You can paint or decorate them for any occasion or holiday!
My wife says we are going to need a lot of tea light candle holders for my daughters wedding next month. My wife really likes the flower and butterfly backdrop you have to go with it. We will look into getting some tea light candle holders and see what ways we can spruce it up a bit. Thanks for sharing your ideas.