
You may know there are many different ways to spicing up your etching with colors. All the different paints and colorants to use have pros & cons. It really depends on your needs when selecting the perfect way to color your etching.
We have discussed using a product called Rub N’ Buff a while back. These colors are very cool, especially if you want a metallic look.
Don’t Discard Your Dried Up Rub N’ Buff
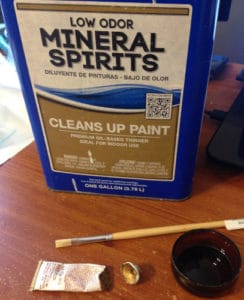
To thin Rub N Buff, gather a solvent, brush and some sort of mixing dish or palette.
If you have a bunch of Rub N’ Buff tubes, it is possible that they may start to dry up after several years. I had mine for about 8 years and some of the caps started getting brittle and falling off. Some of the tubes started drying up.
However, I just wanted to provide this tip: You can still salvage it by mixing solvents with it.
Whether you simply want to make your Rub N’ Buff thinner or want to salvage it, add any of the below to thin it:
- Mineral Spirits (I most recommend this)
- Acetone or Lacquer Thinner (I haven’t tested this but is an option to try if you have it on hand.)
- Nail Polish Remover (Again it hasn’t been tested but if you have the flammable type, most contain acetone)
I used mineral spirits since I believe it is most compatible with the solvent already used in Rub N’ Buff. However, the other solvents should work just fine if that is what you have on hand.
How to Apply Rub N’ Buff on An Etching
You can use a brush or even your fingers to rub the product into the etched surface. However, I have found that using it right out of the bottle like this produces some inconsistent results such as the below. It’s hard to spread and even after applying several coats, it’s still difficult to get a smooth coat required to look good.
The Better Way
After salvaging my Rub N Etch that was drying up, I found that diluting it regardless if it was harden is the best way to apply it.
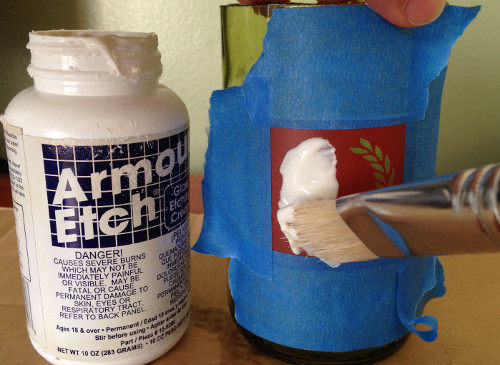
Step 1: Mix Rub N’ Etch and Solvent in a Container
Once the products are in a container, mix them together with a brush or popsicle stick. If the product is hard, you may have to smash it with a stick and mix it.
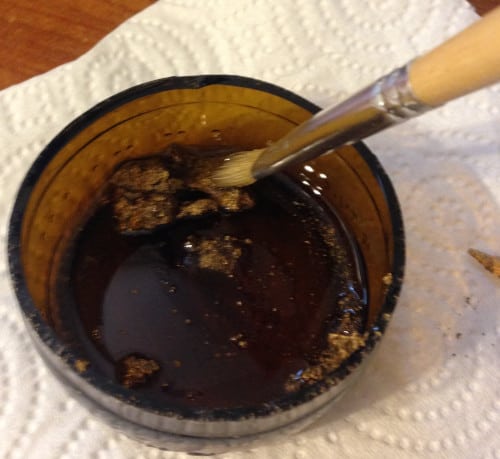
For dried pieces of Rub N Etch, you may want to let it sit in solvent overnight with a cover over it to soften it up. A covered jar would work well to prevent the solvent from evaporating.
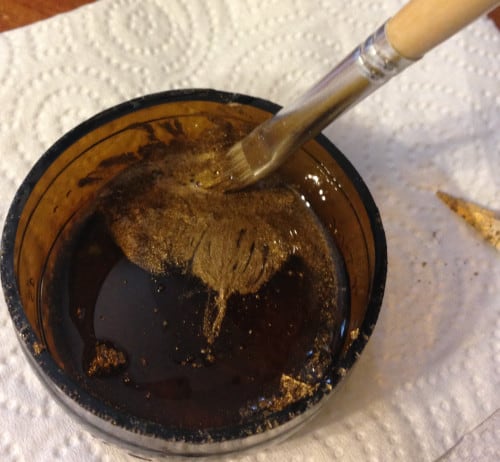
The Rub N Etch is fully thinned with the mineral spirits.
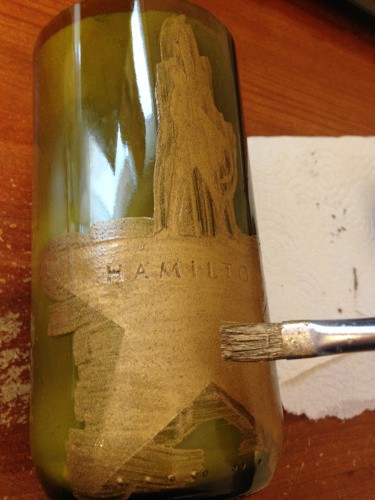
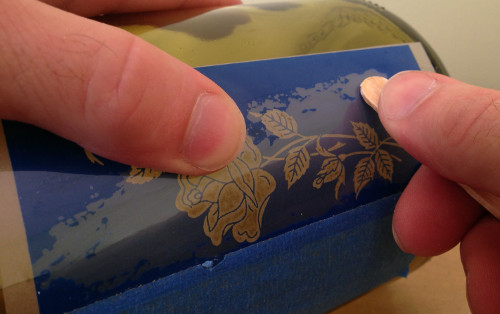
Step 2: Apply Diluted Rub N’ Buff With Brush
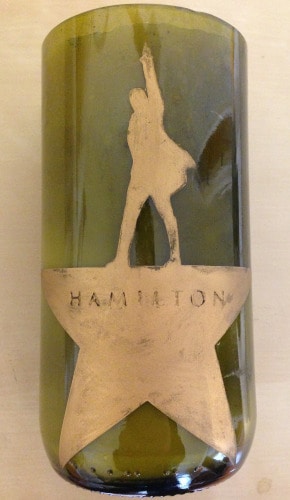
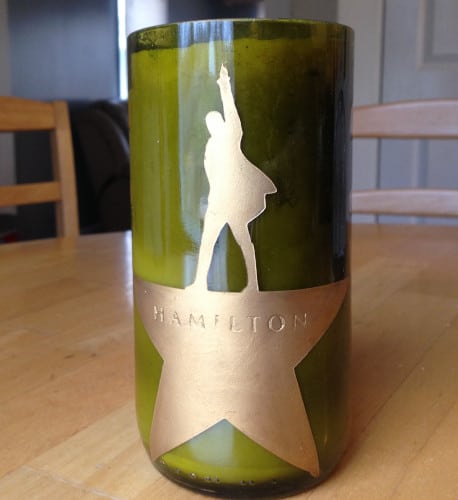
If you still have the stencil on the glass after etching, it may be easier to leave it on for this step. However, we created this homemade cut wine bottle candle project before and decided to color it later on.
Use a brush to apply the diluted Rub N’ Buff over the etching as evenly as possible.
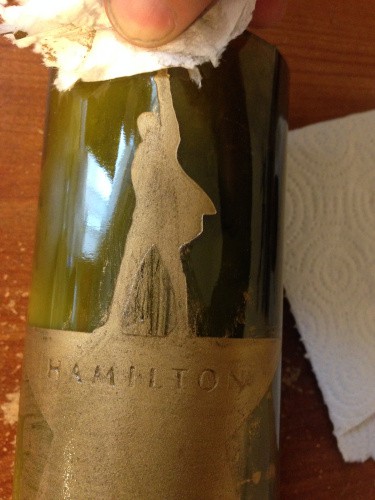
Step 3: Clean Up Outside Edges
Wiping up around the outside of the edges of the etching removes easiest when it is still wet. However, it is also easier to accidentally wipe away the coloring from inside the etching.
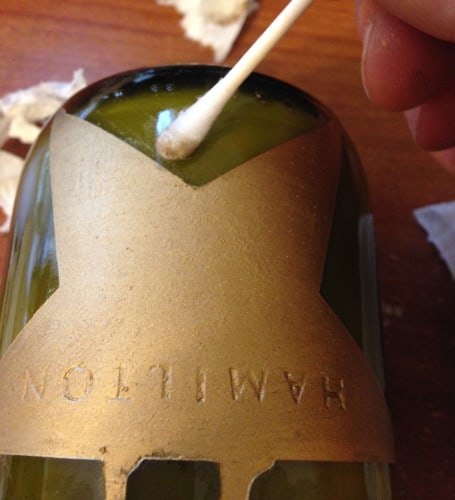
I tried to remove the majority of the color overlap with a paper towel and then followed up with a Q-tip dipped in mineral spirits for islands and edges.
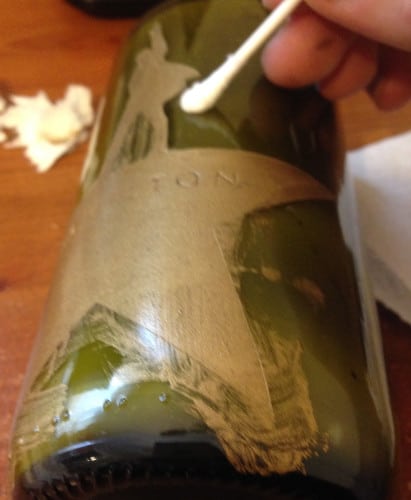
Follow up with a q-tip for intricate areas.
Step 4: Let Dry & Rub Excess
I choose to let it dry for a half hour and then rubbed the residue lightly with a paper towel. You may still have to do some touch ups or add a second coat.
Share this on social media or email by clicking below!
Those are great. I use the rub and buff right on the etchings with out diluting it down. I try and sand etch a little deep this way you won’t need to put on a second coat. Once the rub n buff is applied the next step is wiping as much of it off with a paper towel. Since you would not be able to get the rub n buff all off especially outside the etchings. I take a very fine steel wool no.0000 and remove the rest of the rub n buff off by rubbing gently. This fine steel wool does not leave any scratch marks on the item you have etched and that you used with the rub n buff. It leaves the item etched beautifully looking. Try it with the very fine steel wool when you apply the rub n buff you will find it will do the job very well.
I recently inherited a James Bruce piece called “Getting Them Through” I would love to know more about it. Possibly who to talk to about info about it
Thank you