
 Because there was a lot of interest in Derek’s diamond-tipped scribe engravings and I never tried it before, I wanted to post a simple beginner tutorial here on how to do it.
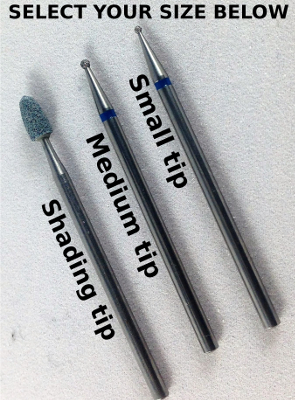
The 3 piece diamond-point engraving scribe set used in this tutorial can be found on Amazon here: http://amzn.to/2sg62m3
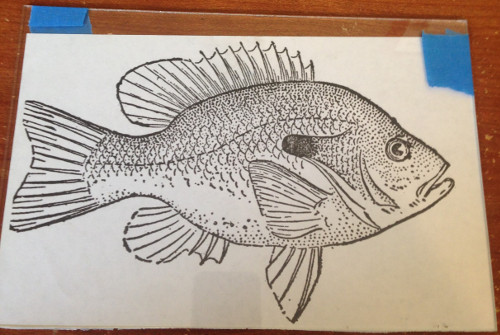
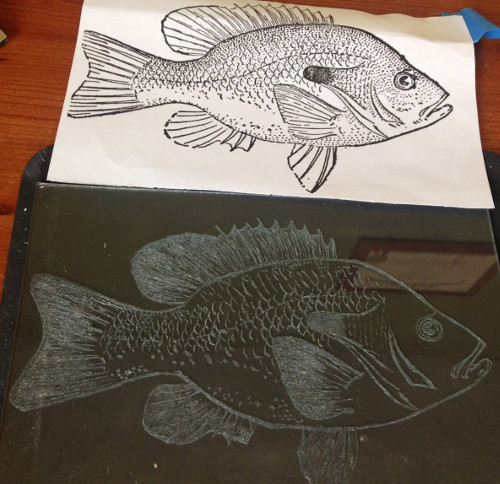
- I first searched for a pattern online that had more of a sketching look to it. I found a fish design to experiment with which I believe is a bluegill. The design was resized to the glass size and printed out.
- Tape the design to back of glass. I just taped the top side so that I could lift up the paper design and check on my progress.

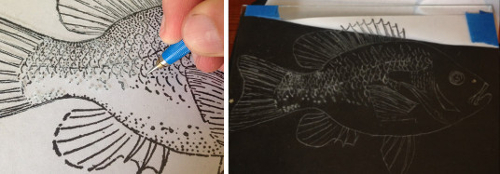
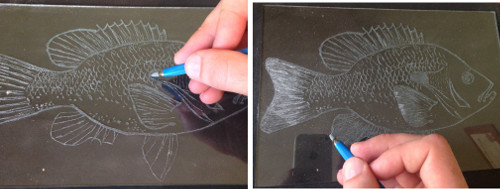
- Outline with small tip. Begin engraving by using the fine diamond tip and lightly scratch the glass by tracing over the design lines. This is meant to simply get the outline roughly into the glass so the other tips can enhance it later.

On the left shows just starting to use the small scribe tip and the right is after the whole design was outlined with the small tip.
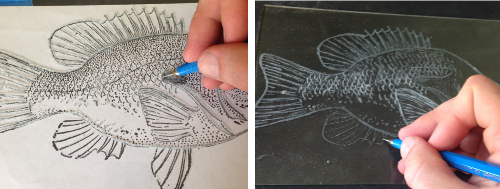
- Enhance with medium tip. Then use the medium tip to enlarge the previous small tip engravings and add more detail.

On the left is the start of the medium tip and right shows what it looks like after adding in more detail.
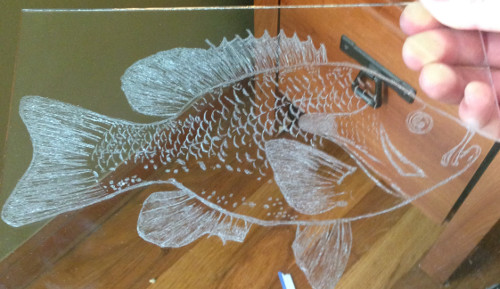
- Shade with large shading tip. Now you can use the larger shading tip to blend in and shade areas of the pattern. It will remove the rough edges and make the design stand out more.
Left shows the start of using the shading tip. The right shows the back and lower fins shaded.
Notes & Tips
- Even small patterns can take a considerable amount of time engraving. If I remember correctly, each tip took me around 30-45 minutes to engrave.
- This can be rough on the hands, especially when engraving hard glass that requires you to press harder. You may want to stretch you hands before and occasionally during the project.
- A softer glass is best because there will be less stress on your hands and won’t wear out your scribe tips as much.
- Get a small cup of water and occasionally dip the scribe in to wash off the glass particles. This will ensure it continues to be sharp in engraving and prolong its life. If you don’t wash it off, you will notice glass particles will fill up the scribe and make it ineffective at engraving.
Other Pictures
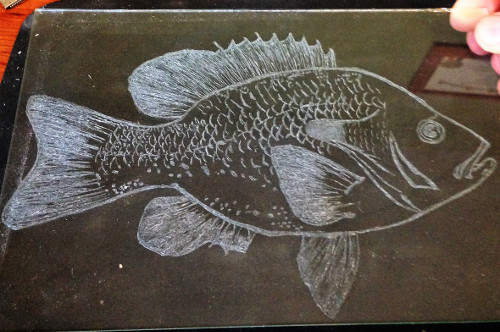
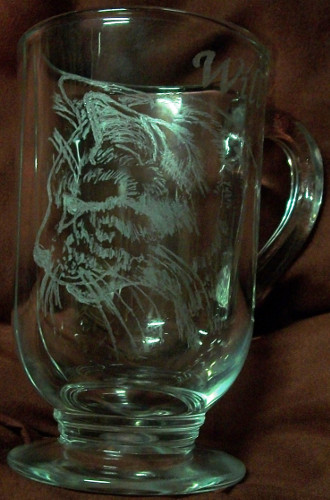
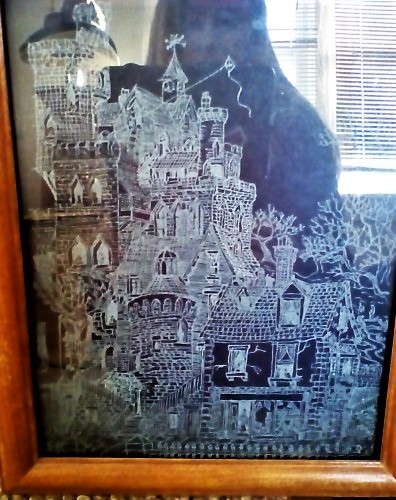
I posted other pictures of the completed project below. The first is a view of the engraving without the black background and the second picture shows the pattern above the engraving.
If you have any comments or questions, please leave them below. Also, if you have any other suggestions, please let us know. Thanks!
Share this on social media or email by clicking below!
Could you please mention the tool name which you have used….
Could you please mention the tool name which you have used ?
The beauty of etching is there but need more vanishing smoke going to the center of the fish body,.
@Akila, it’s mentioned in the post, but here is the link again: http://amzn.to/2sg62m3
@Art, great suggestions and I agree. This is just a bit of a beginner example that I tried.
Nice work, indeed it can be tiring on the hand to give pressure to cut into the glass and easily creates cramp. Engrave in smaller doses it what I did. My other problem is that the diamond coated burrs do not last very long. When I asked the shop where I buy mine in Athens I was told that basically the tips are used by dentists and that they are designed to work
properly at between 300-400,000 RPM, that’s a lot of revs and can only be achieved by air driven (pneumatic) tools.
It appears that by using them as I do the diamond dust gets dislodged. I have tried tungsten carbide tips but they need even more pressure to bite into the glass.
Derek.
I do this with a handheld dremmel which has a low setting and also has diamond tip options. Way less hand work
I have used a dremmel in combination with sandblasting to really open up the options of what you can achieve. Thank you for sharing. Nice work. Might be interesting to see how filling the etch with color might really make things stand out. Perhaps even coloring the etch and then adding a silvery background on the fish and follow it up with a blue/aqua tint (Indian ink maybe?) over the rest of the glass to make it look like your under water. Always fun seeing what can be done. You can make a dozen “copies” of the same work and come up with a dozen different versions on how it could be finished. Keep on Keeping on!
Very nice work, I also use diamond tips and also make fish engravings you are spot on with your work, fish are really not that easy to and have them have a looks of realism in them I have been lucky enough to get two flex shafts which helps with the hand cramping, and I have read the above posts about the diamond tip bits for those who have trouble with them I have always use a bit of water when I swing them keeps them clean and they last alot longer also not when they dull on you, don’t throw them away the dull ones are best for shading where deep cuts will not work
@Dan, great suggestions. I might actually do this since you suggested and post it soon.
William, that is a great suggestion- I will save onto my dulled ones. Also, if you would be open to sharing photos of your work, I and others would like to see them.
Thanks
Ive been doing this form of engraving for about 15+ years now. Considered in some circles as a Master Engraver. I use a dremel with mainly diamond tips in my work. A dip in water is essential for the bits to perform at their best. This also increases their longevity. Be wary of some ‘lower end’ bits, they do not last and sometimes mar your piece. Nice 1st job on the fish (thumbs up)